
User Guide
A guide on how to make payments with SoloPay.
Before You Start
To make payments with SoloPay, you need:
- MetaMask or Trust Wallet (browser extension or mobile app)
- ERC-20 token balance to pay with
No Gas Fees
SoloPay covers blockchain gas fees on your behalf. You don't need POL or any other native token to pay.
Step 1: Select a Payment Token
When the payment widget opens, click the token selection field—the row showing the token name, payment amount, and down arrow.
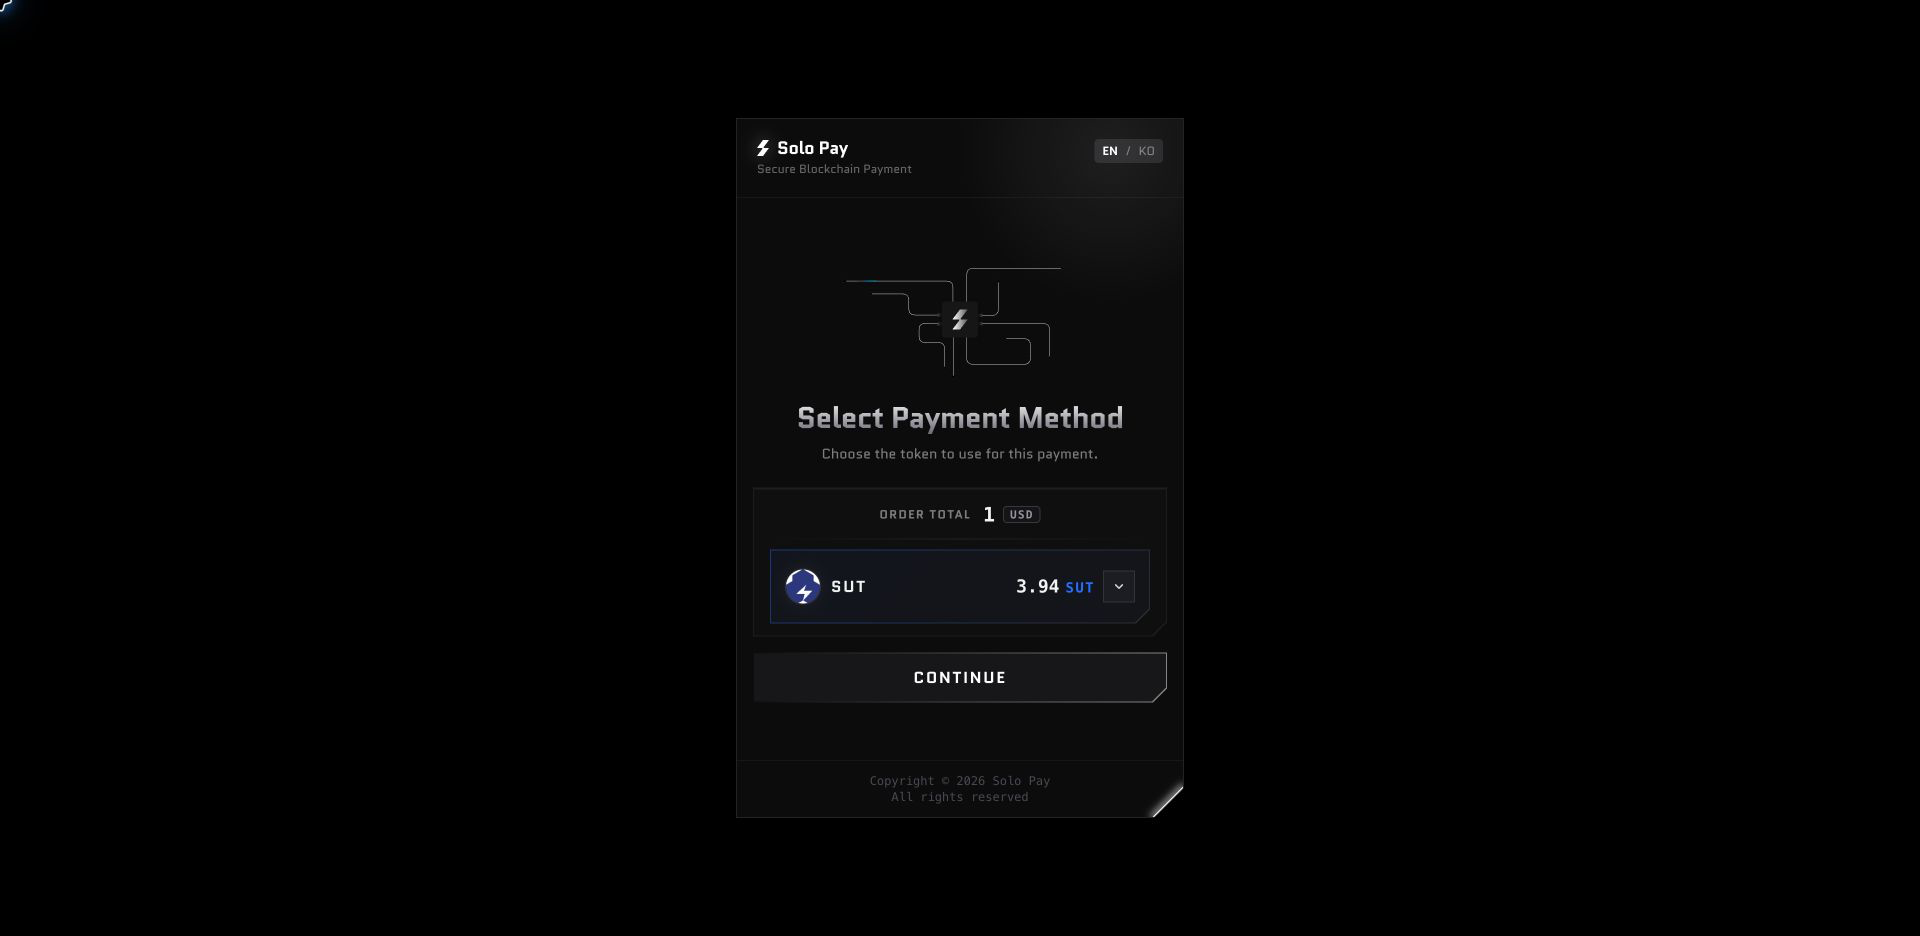
In the Select Payment Token dialog, choose the token you want to use and click SELECT. Then click CONTINUE on the payment method screen.
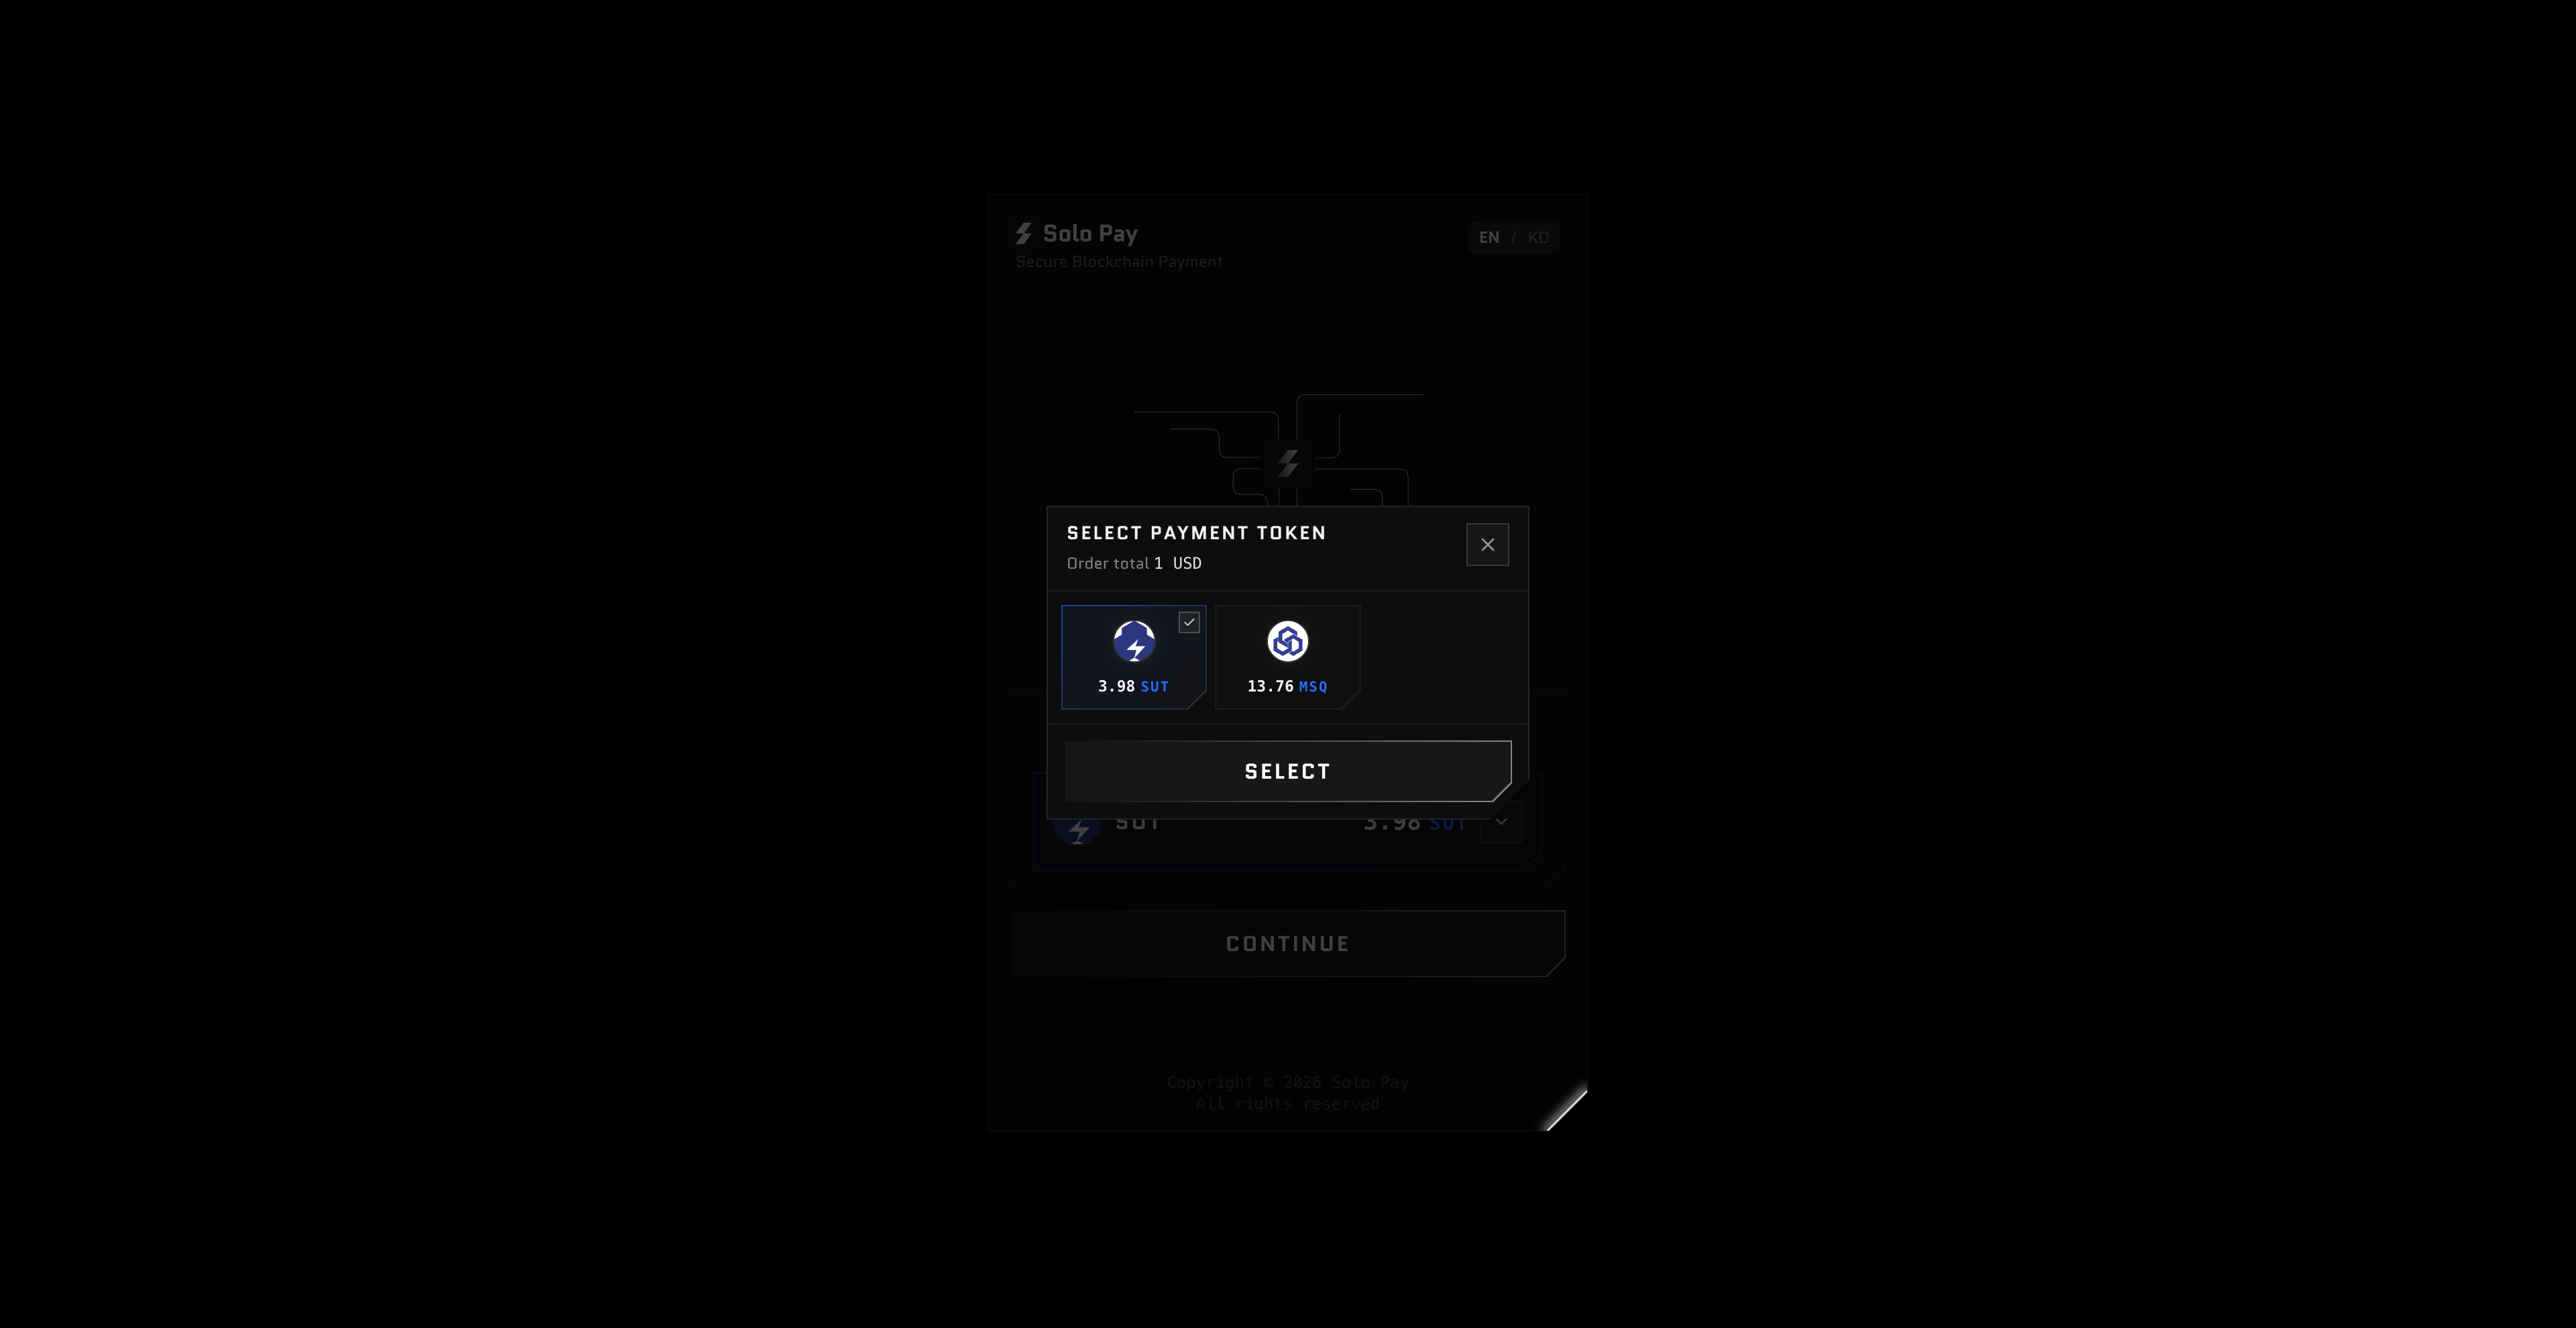
This step is shown when the merchant accepts two or more tokens. If only one token is available, the widget skips this step automatically.
Step 2: Select Your Wallet
Select the wallet you want to use. To choose a different token, click Change payment method at the bottom of the widget.
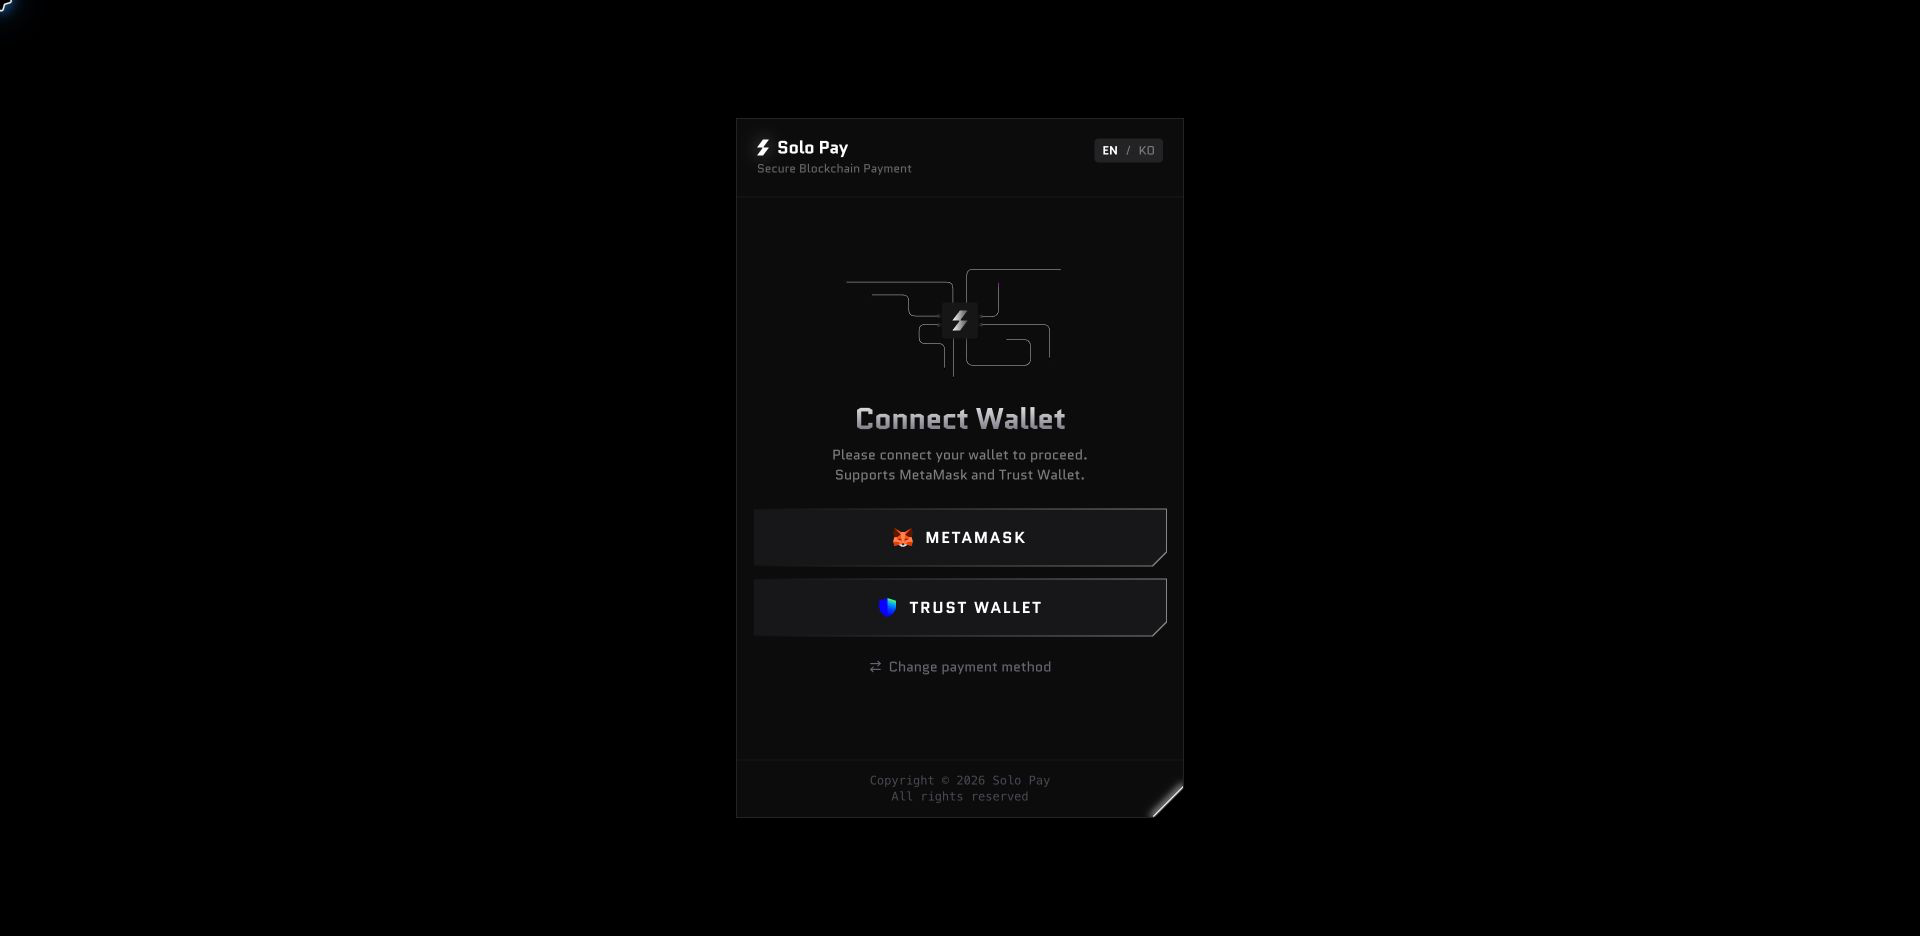
Paying with MetaMask
Step 3: Approve Connection
A MetaMask popup will appear. Select your account and click Connect.
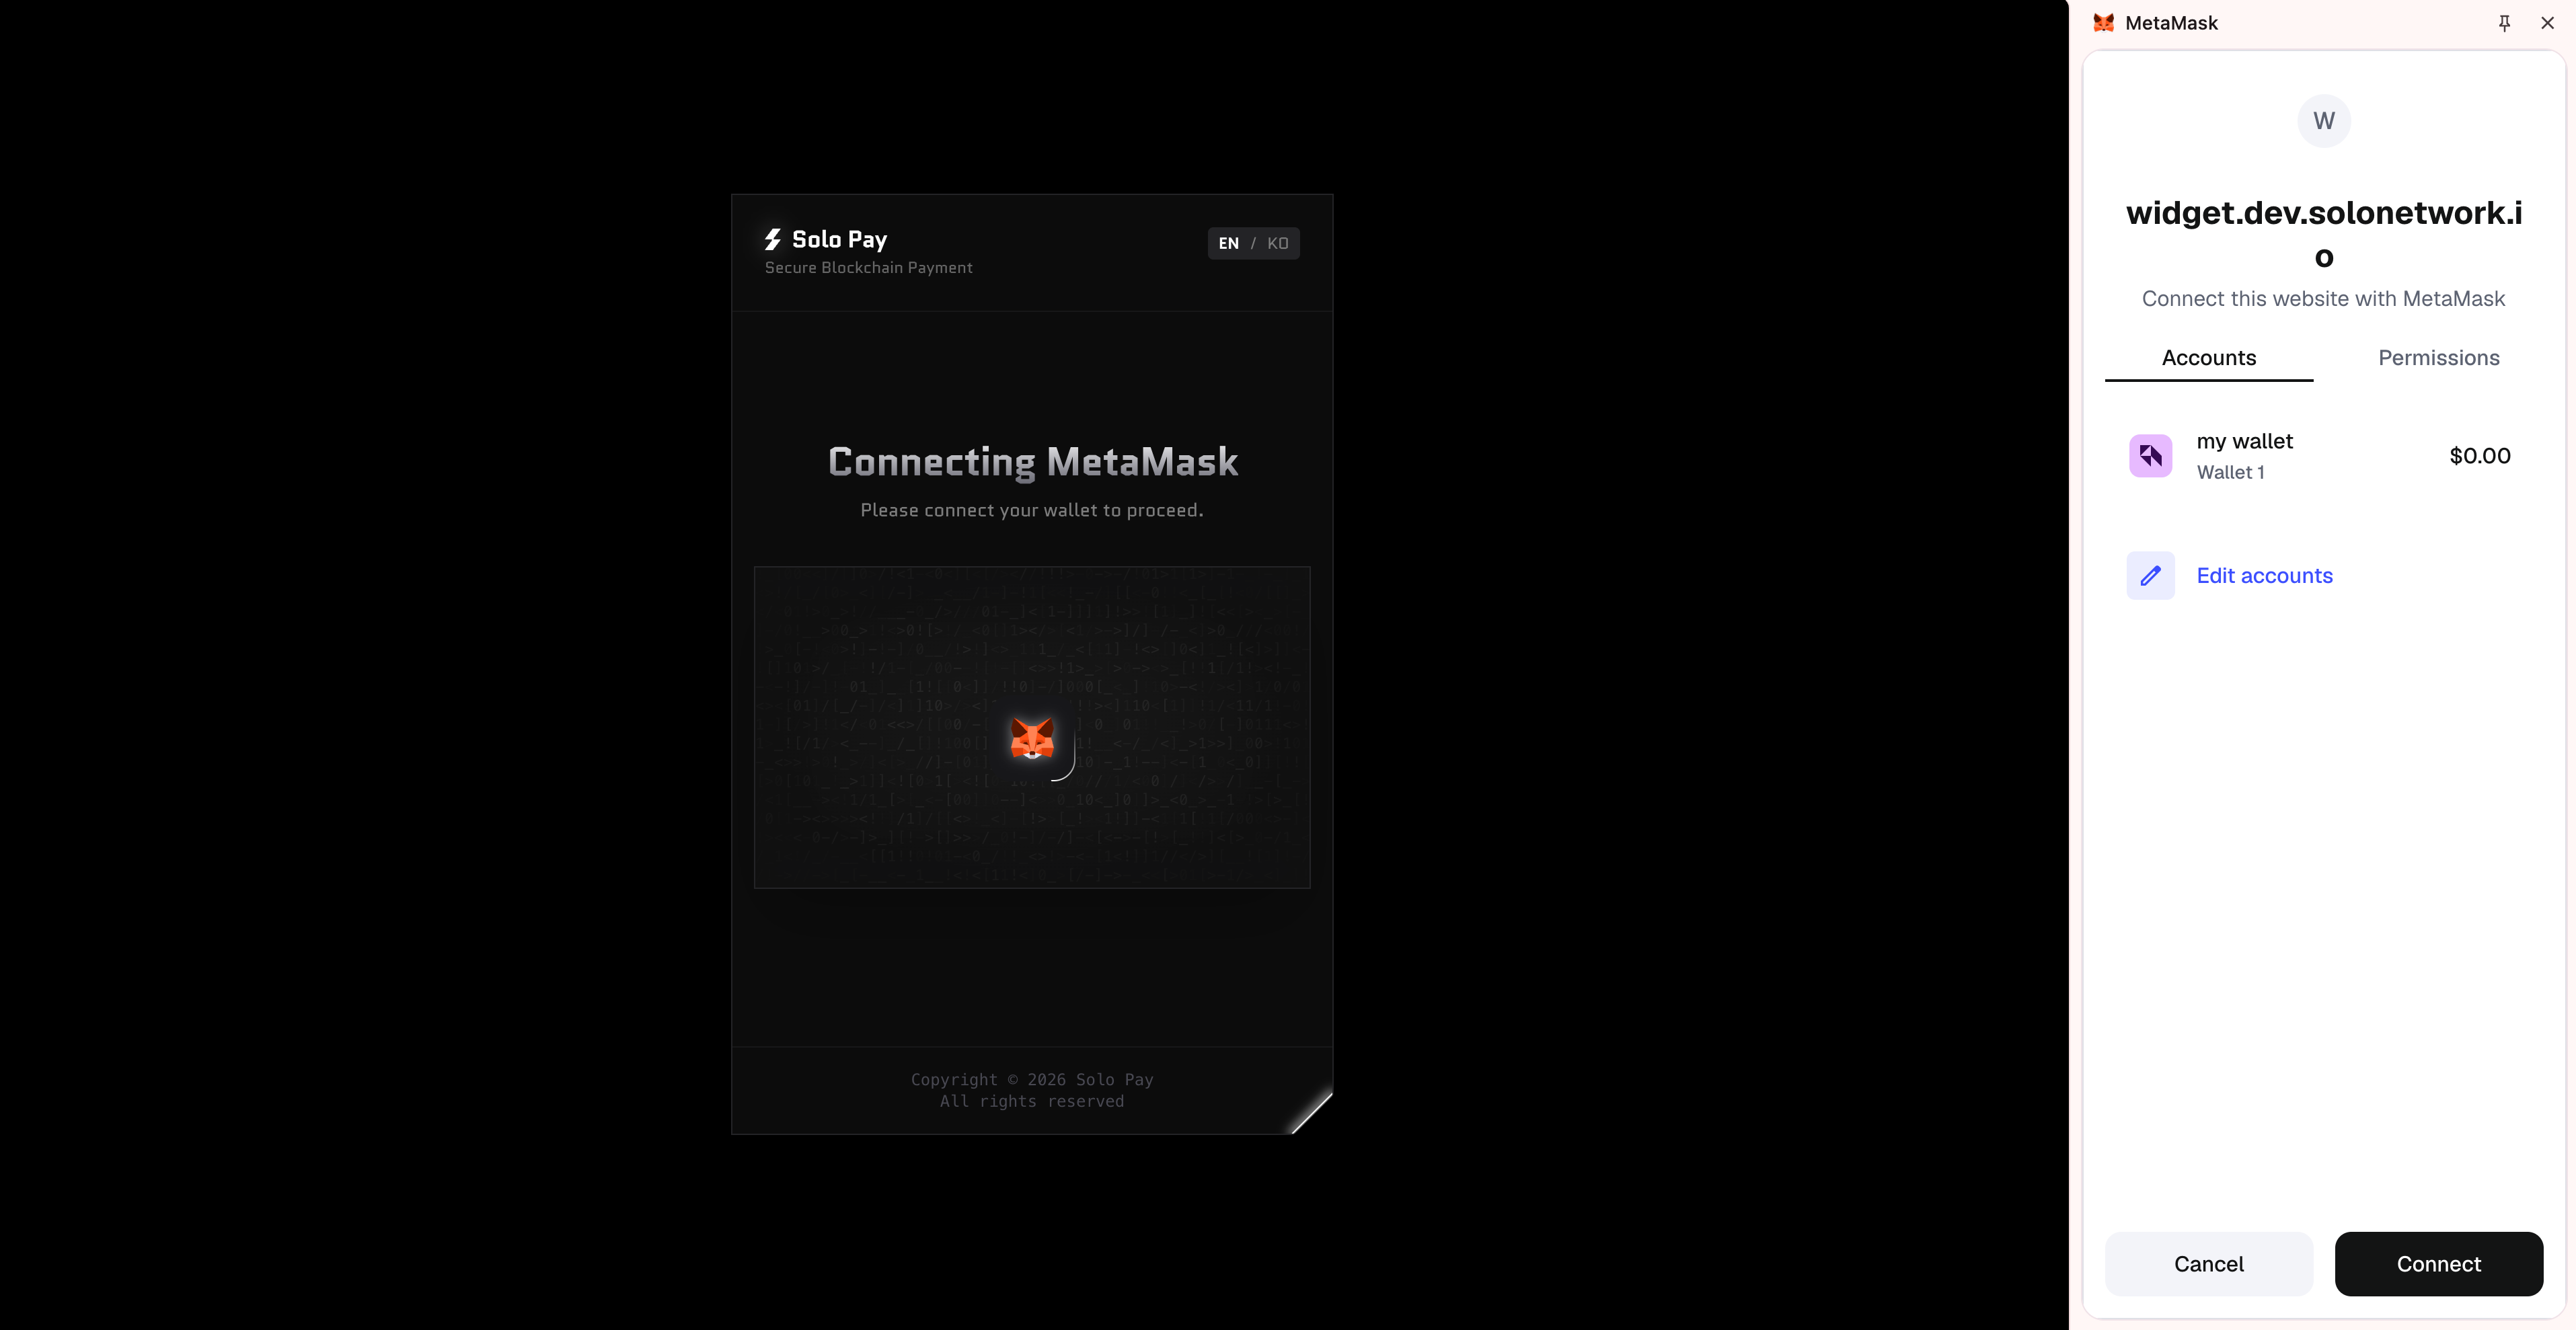
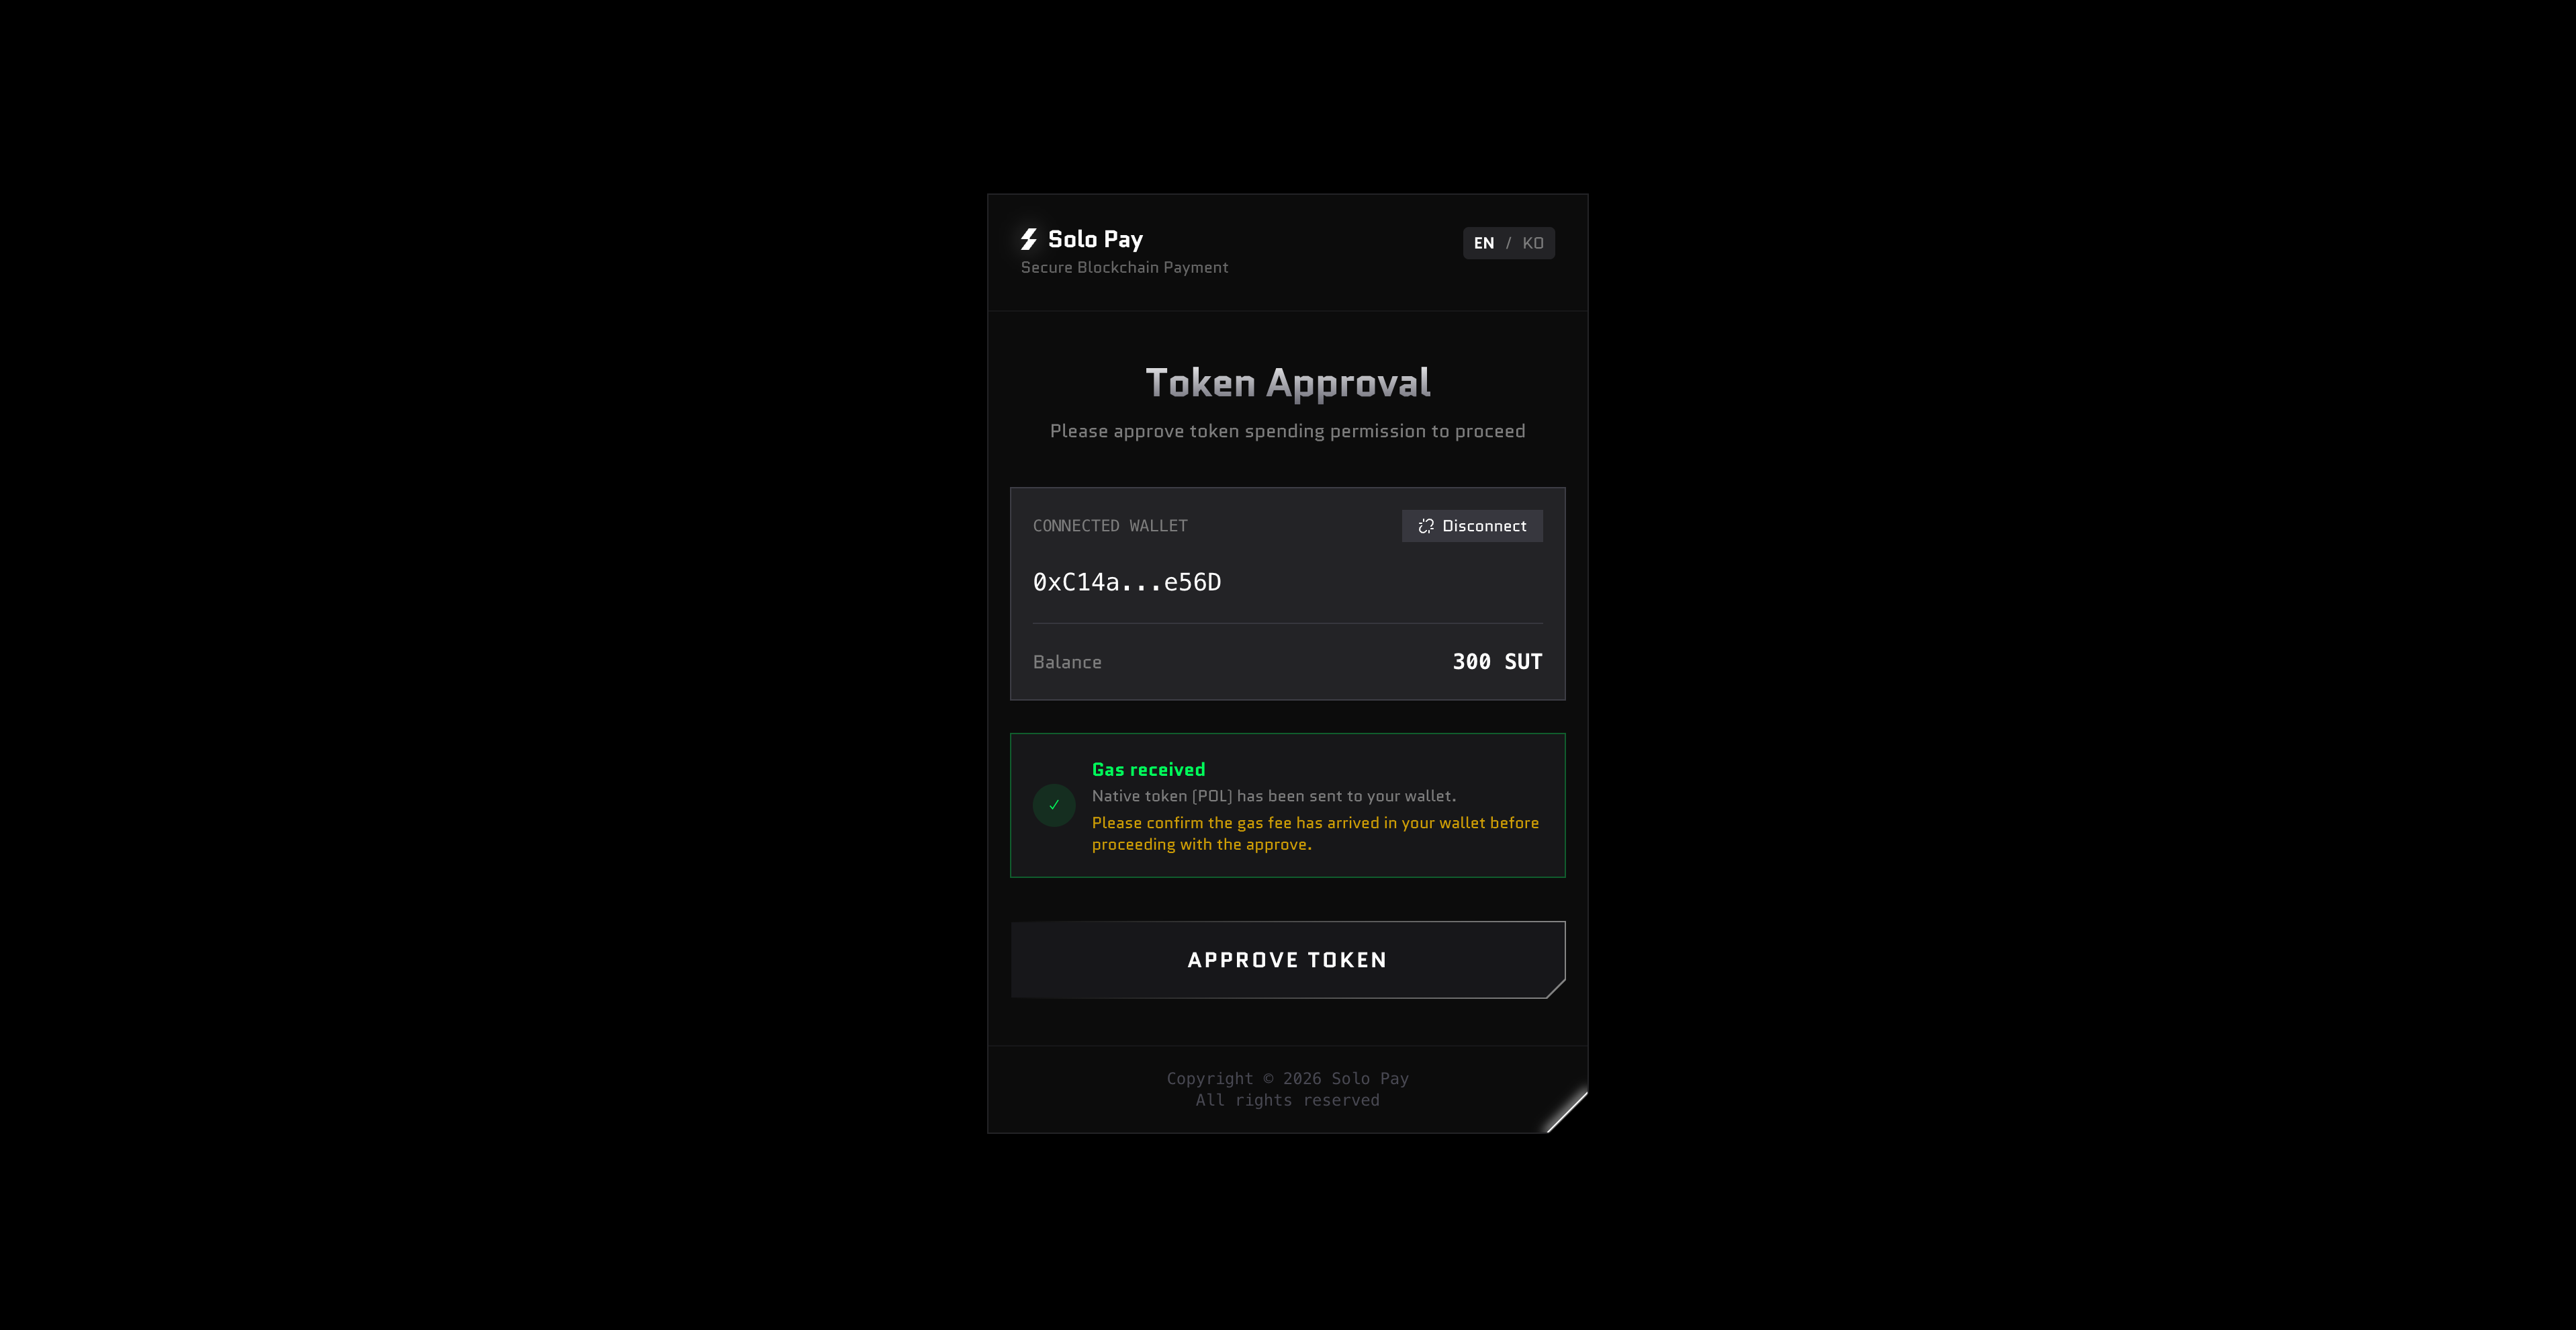
Step 4: Approve Token Usage
Click APPROVE TOKEN in the widget.
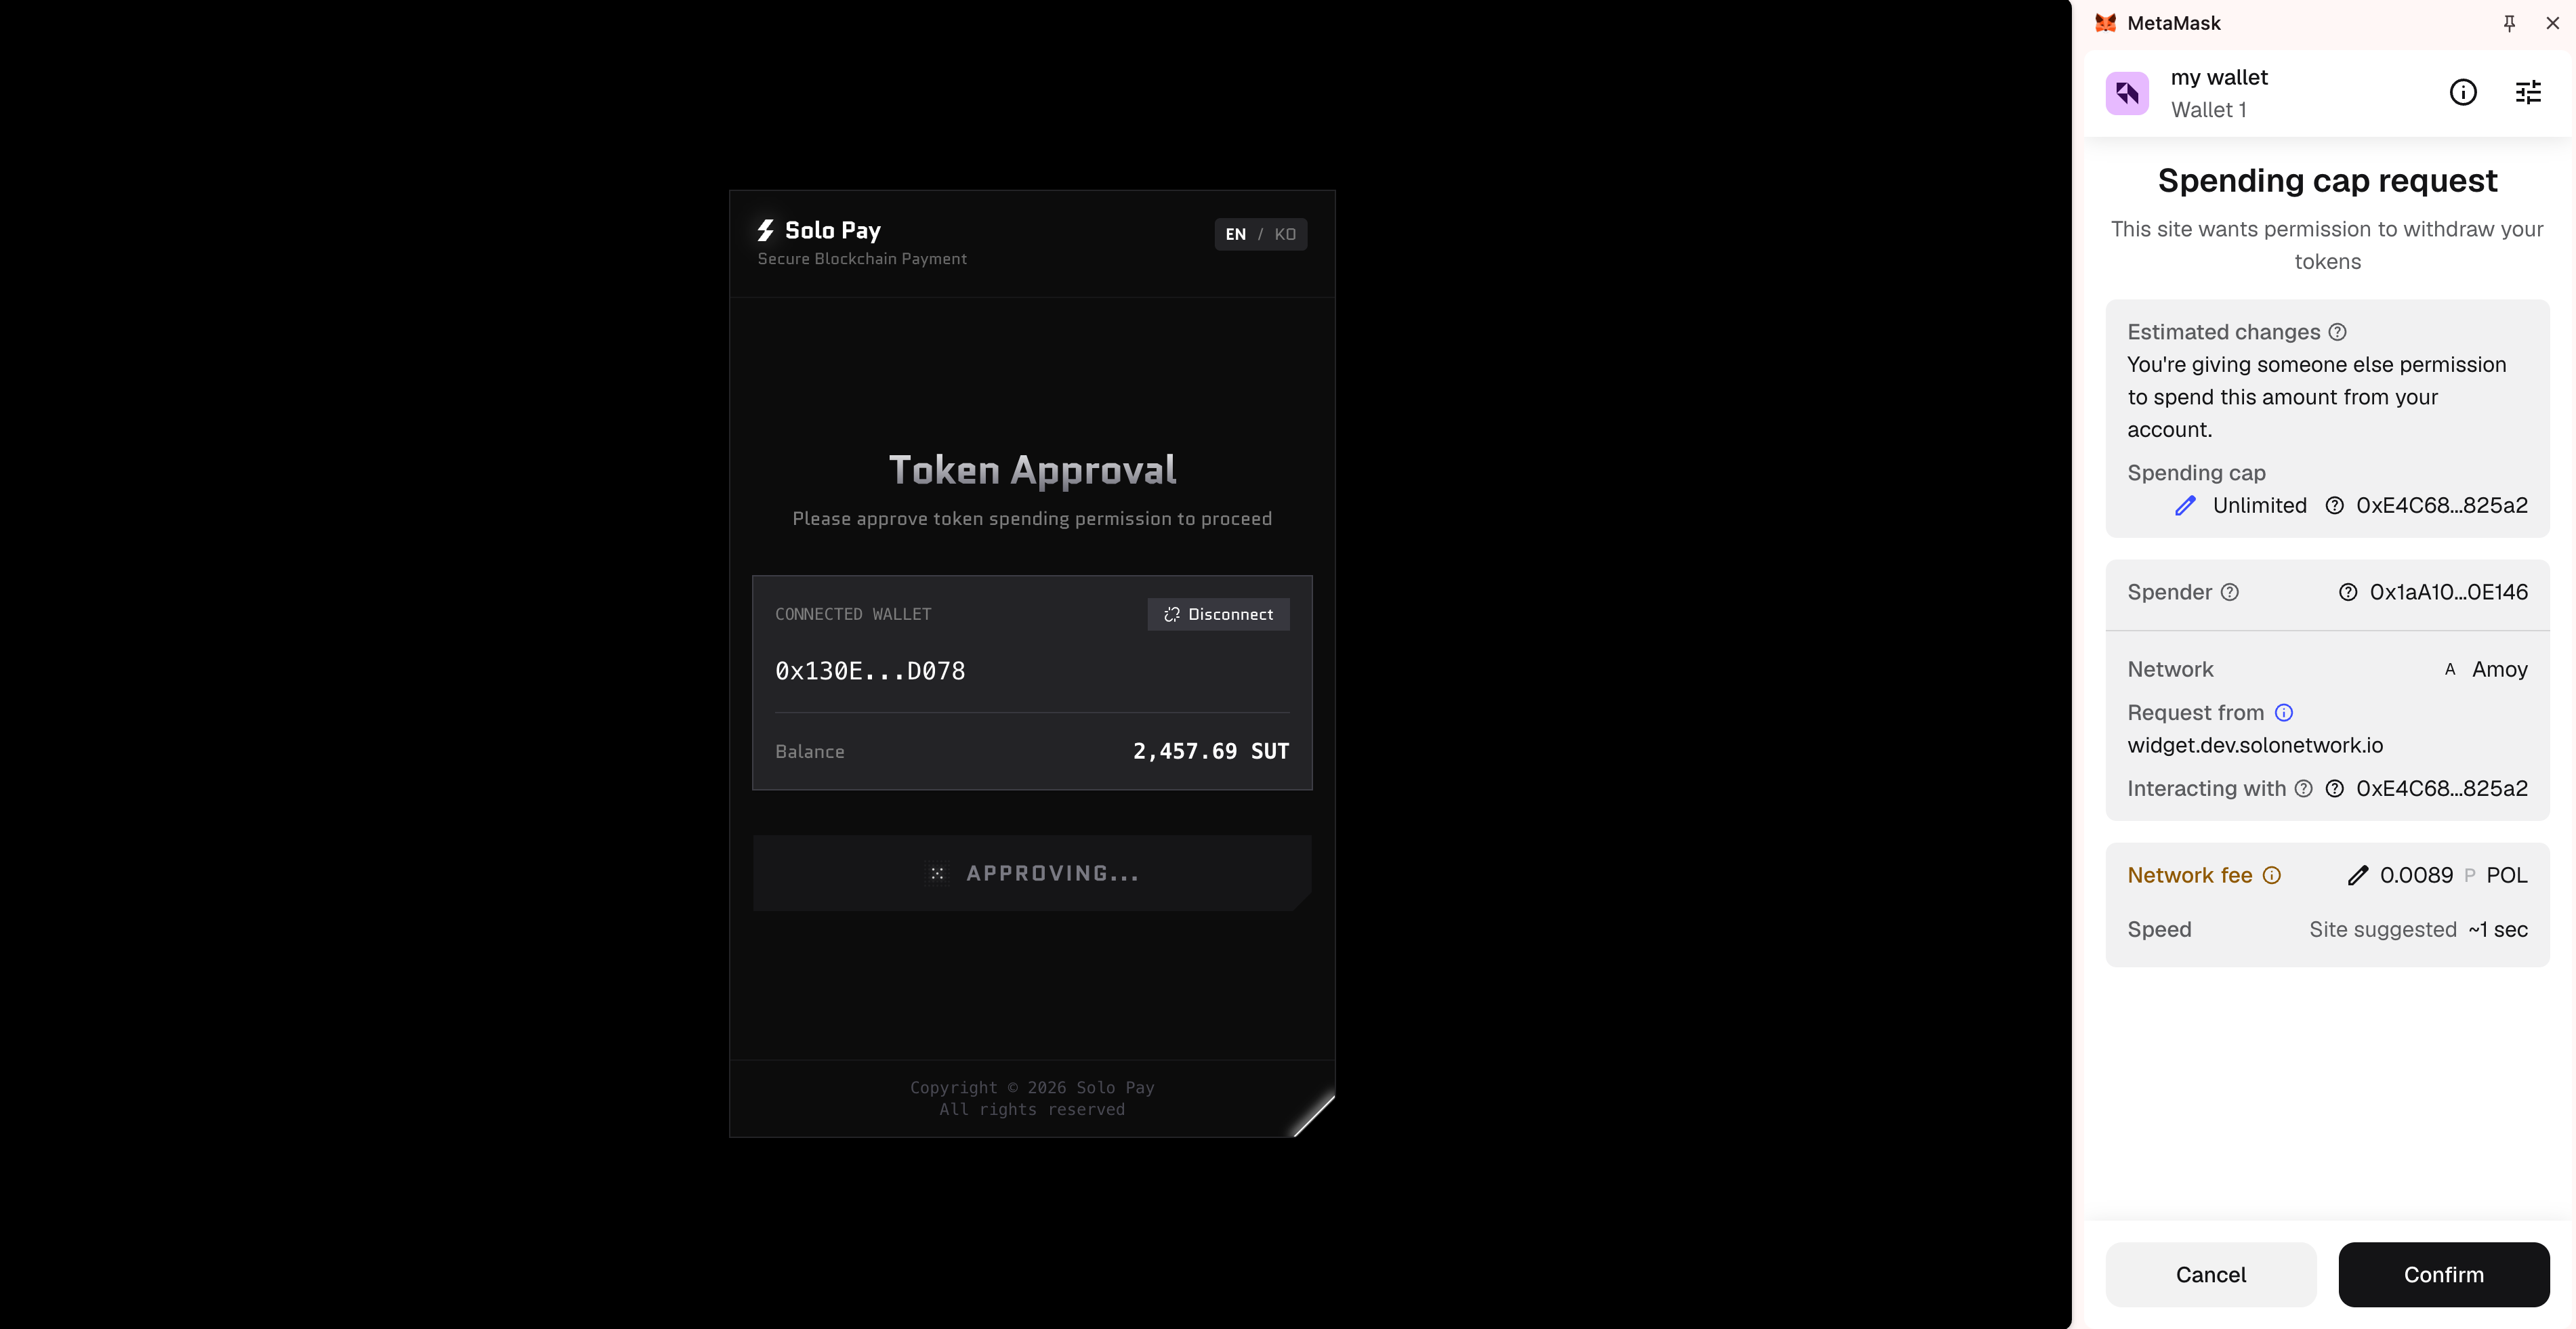
When the MetaMask Spending cap request appears, review the details and click Confirm.
Step 5: Review Payment Details & Proceed
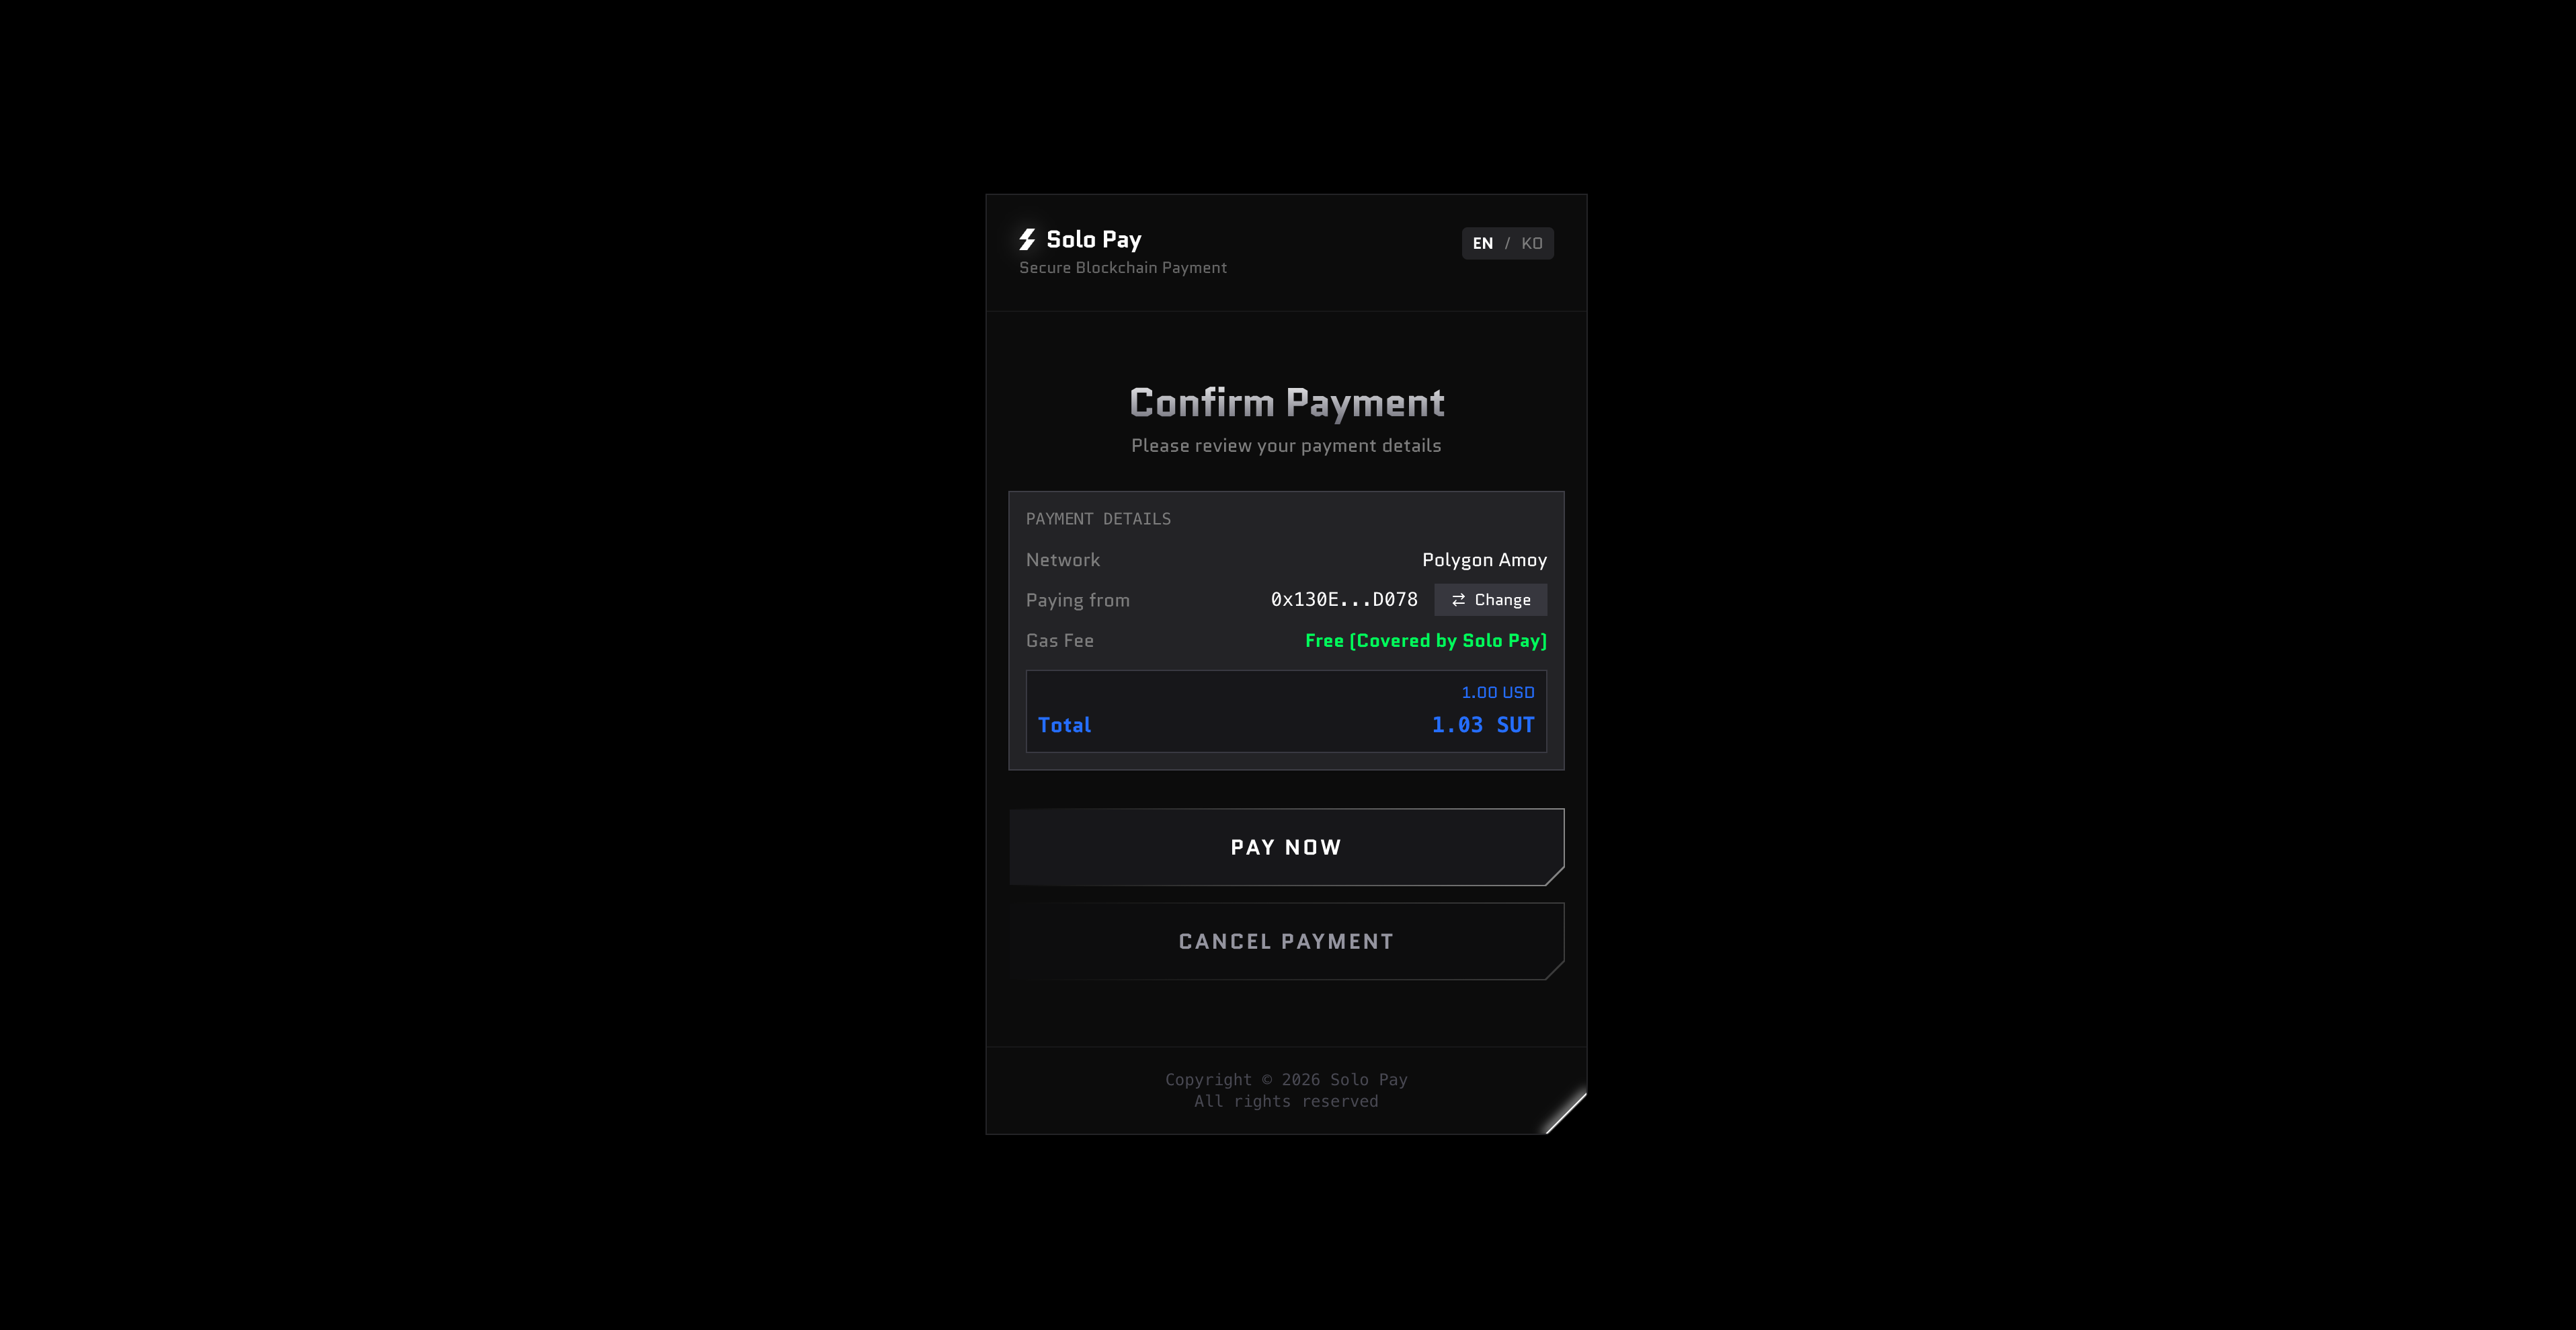
Once token approval is complete, you will proceed to the payment screen. Review the amount, network, and gas fee. The gas fee shows Free (Covered by Solo Pay). Click PAY NOW.
Step 6: Sign the Payment Request
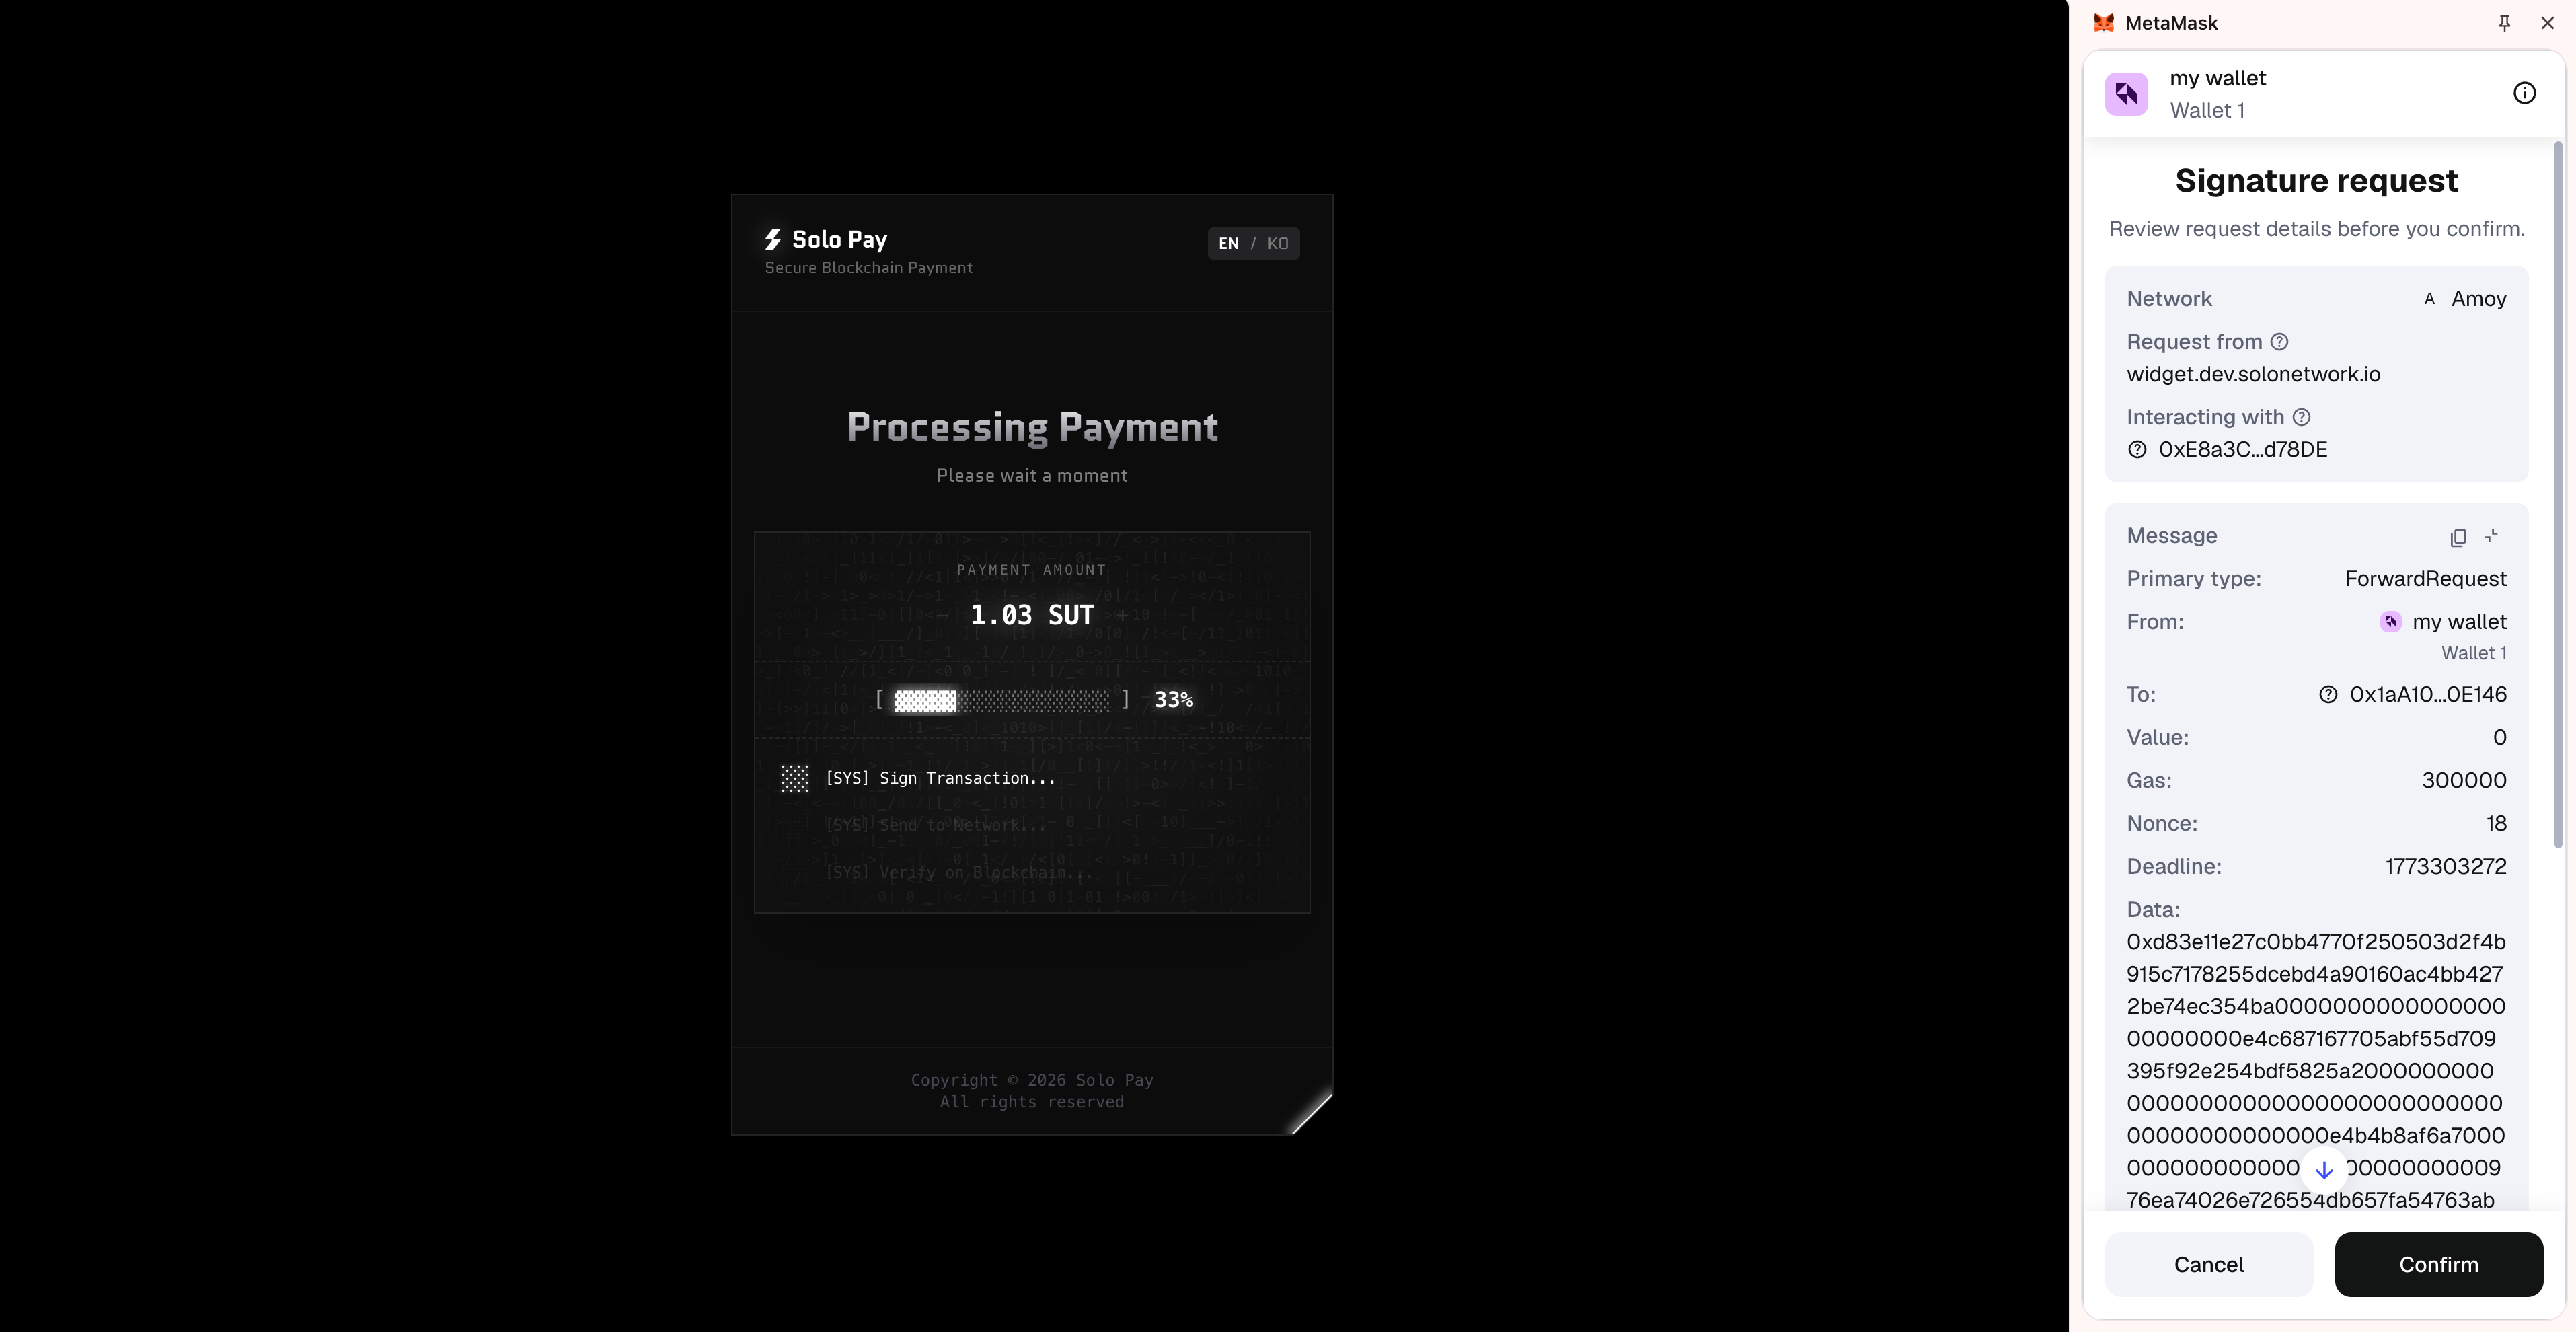
A Signature request popup will appear. This is the final payment authorization signature. No gas fee is charged. Click Confirm.
Step 7: Payment Complete
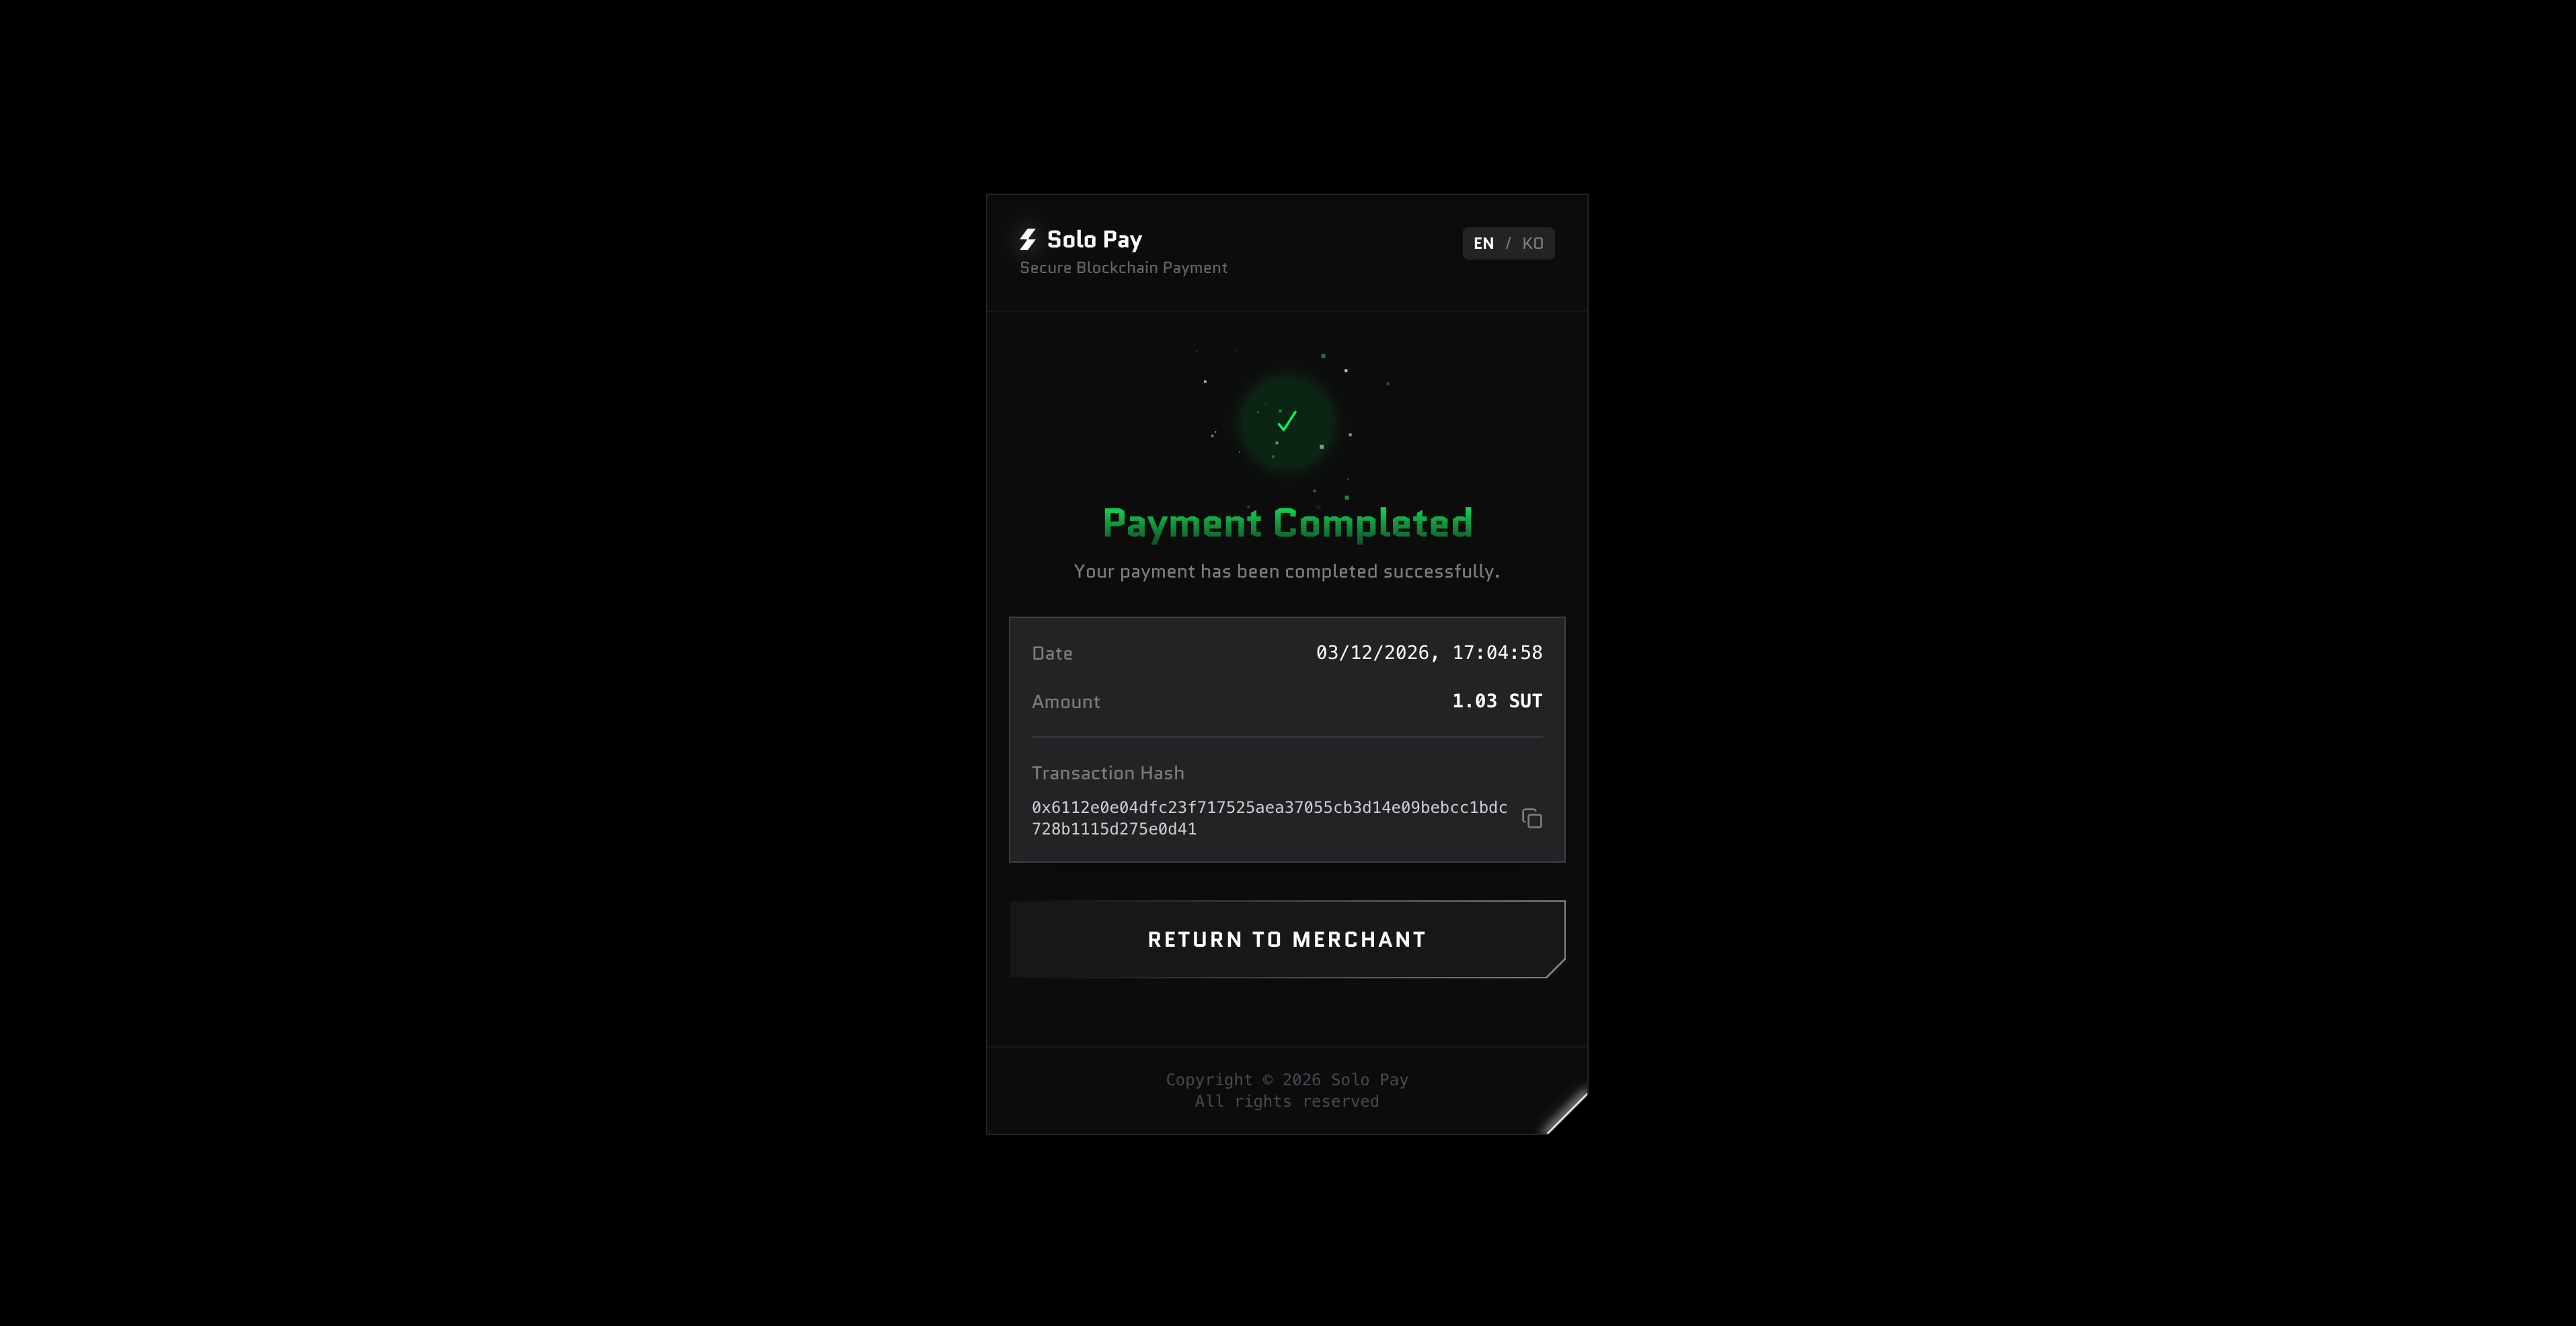
When the Payment Completed screen appears, your payment is processed, and the funds are held securely. Click RETURN TO MERCHANT to return to the merchant page.
Paying with Trust Wallet
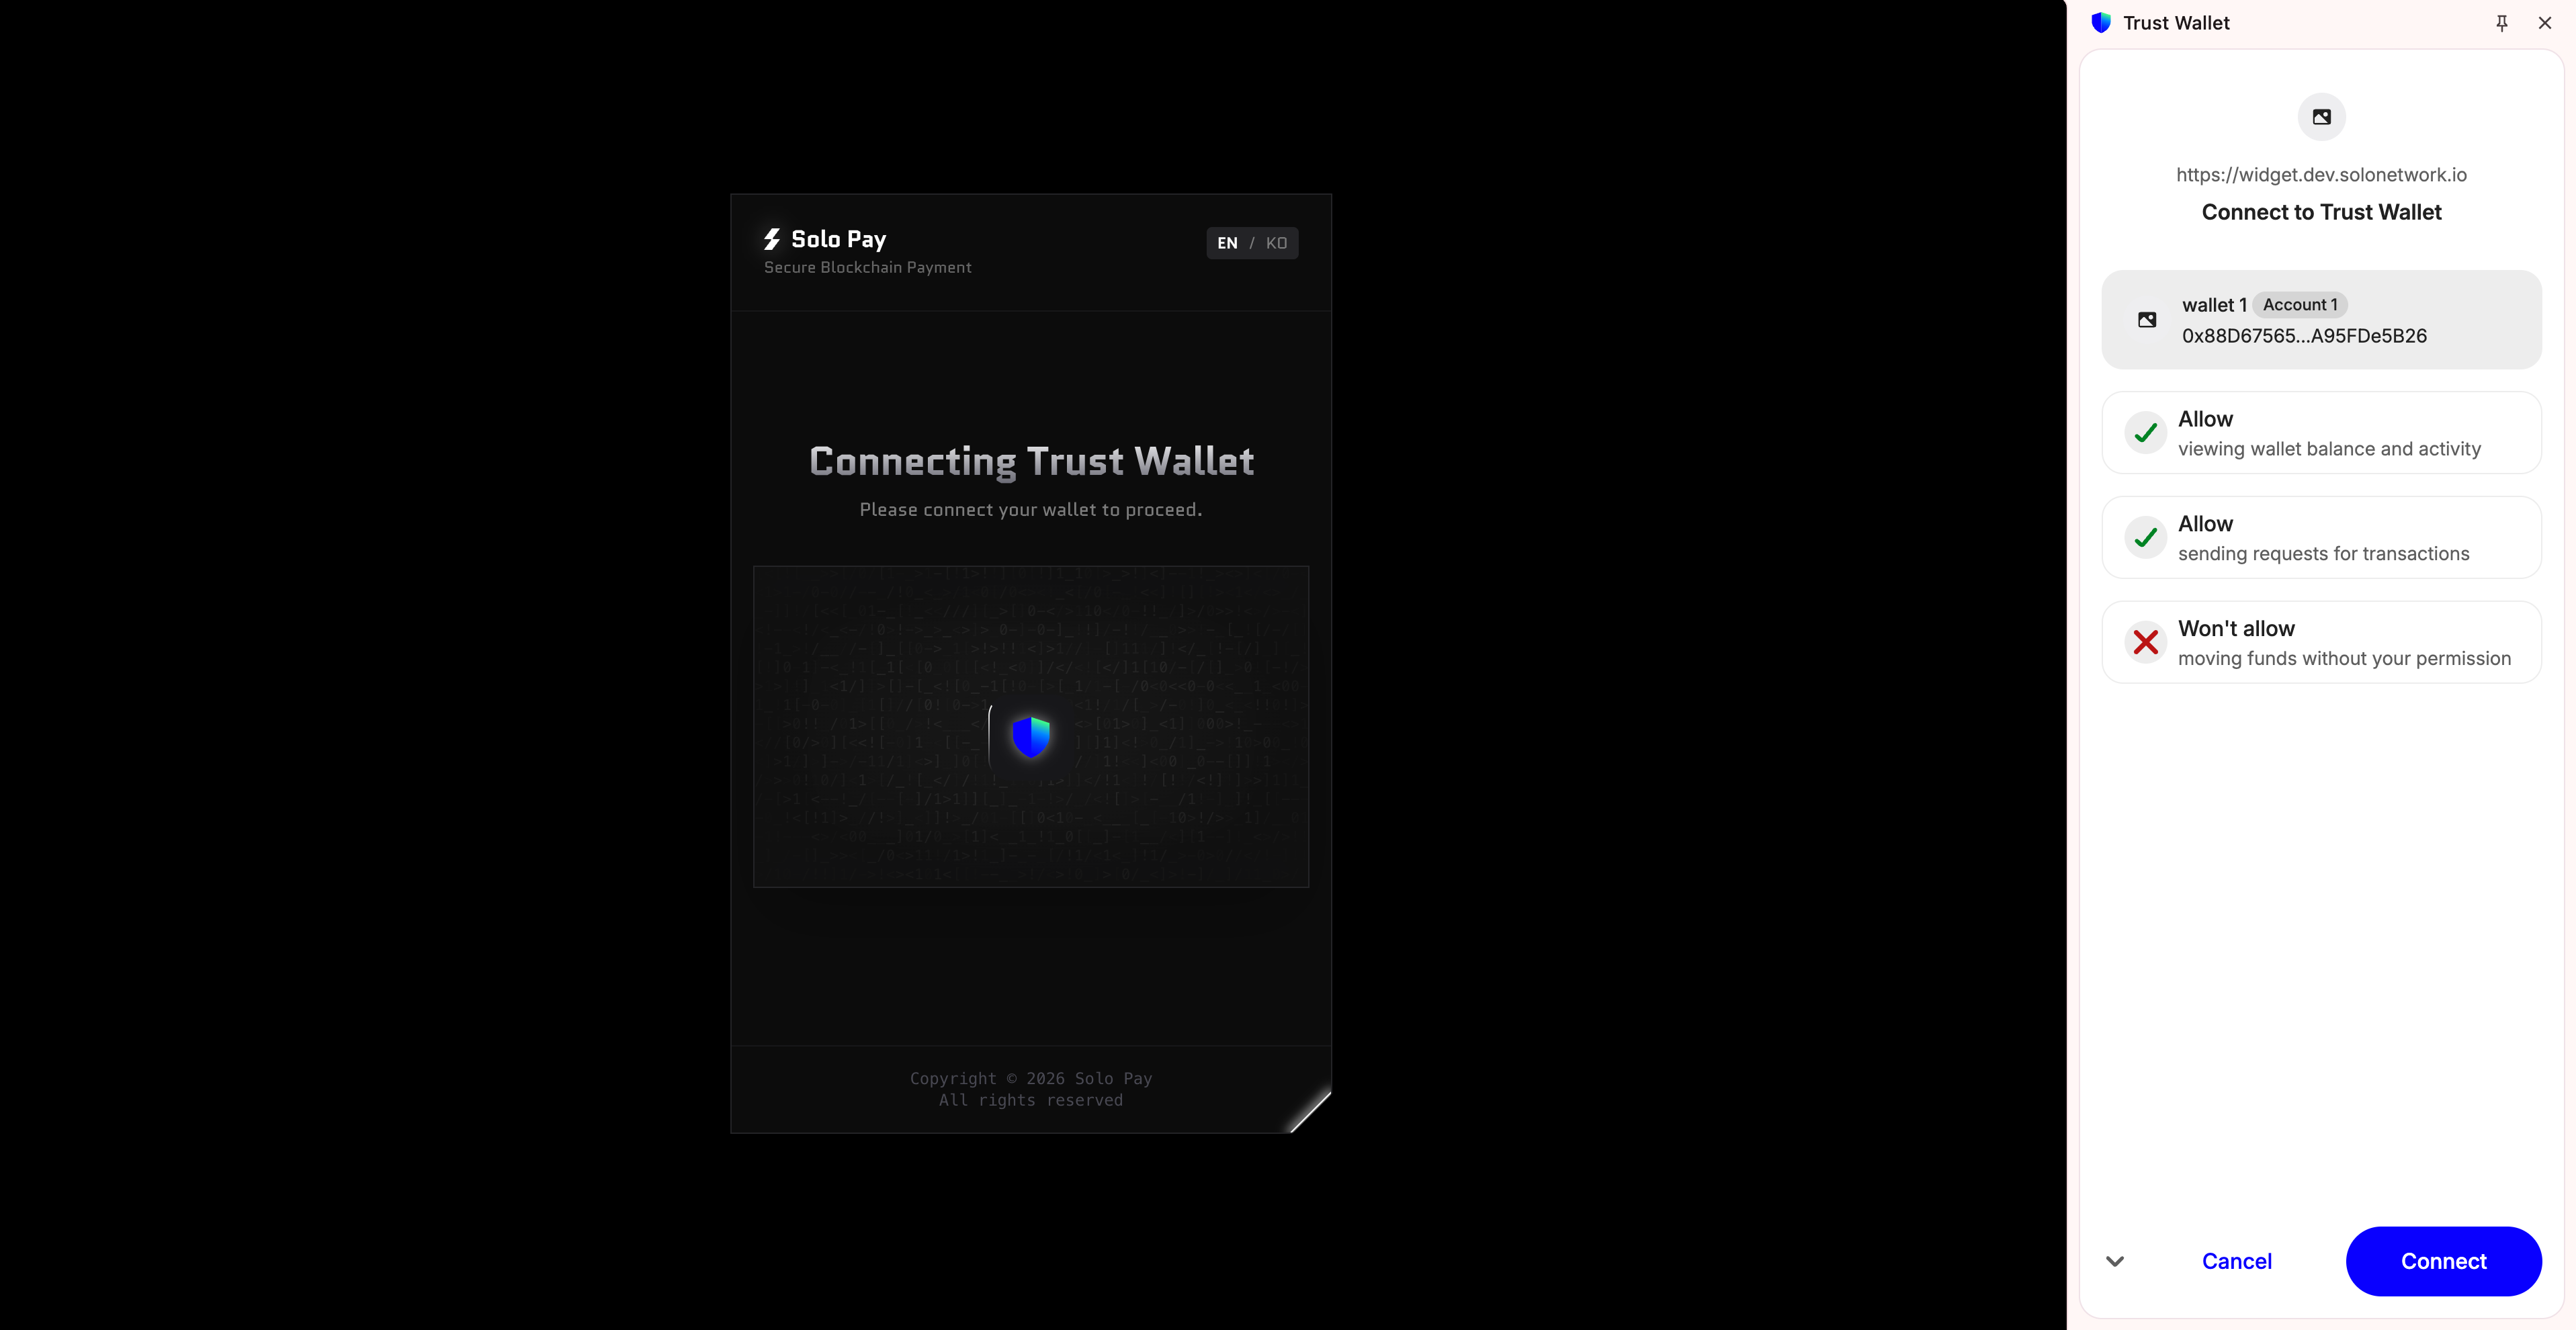
Step 3: Approve Connection
A Trust Wallet popup will appear. Confirm your account and click Connect.
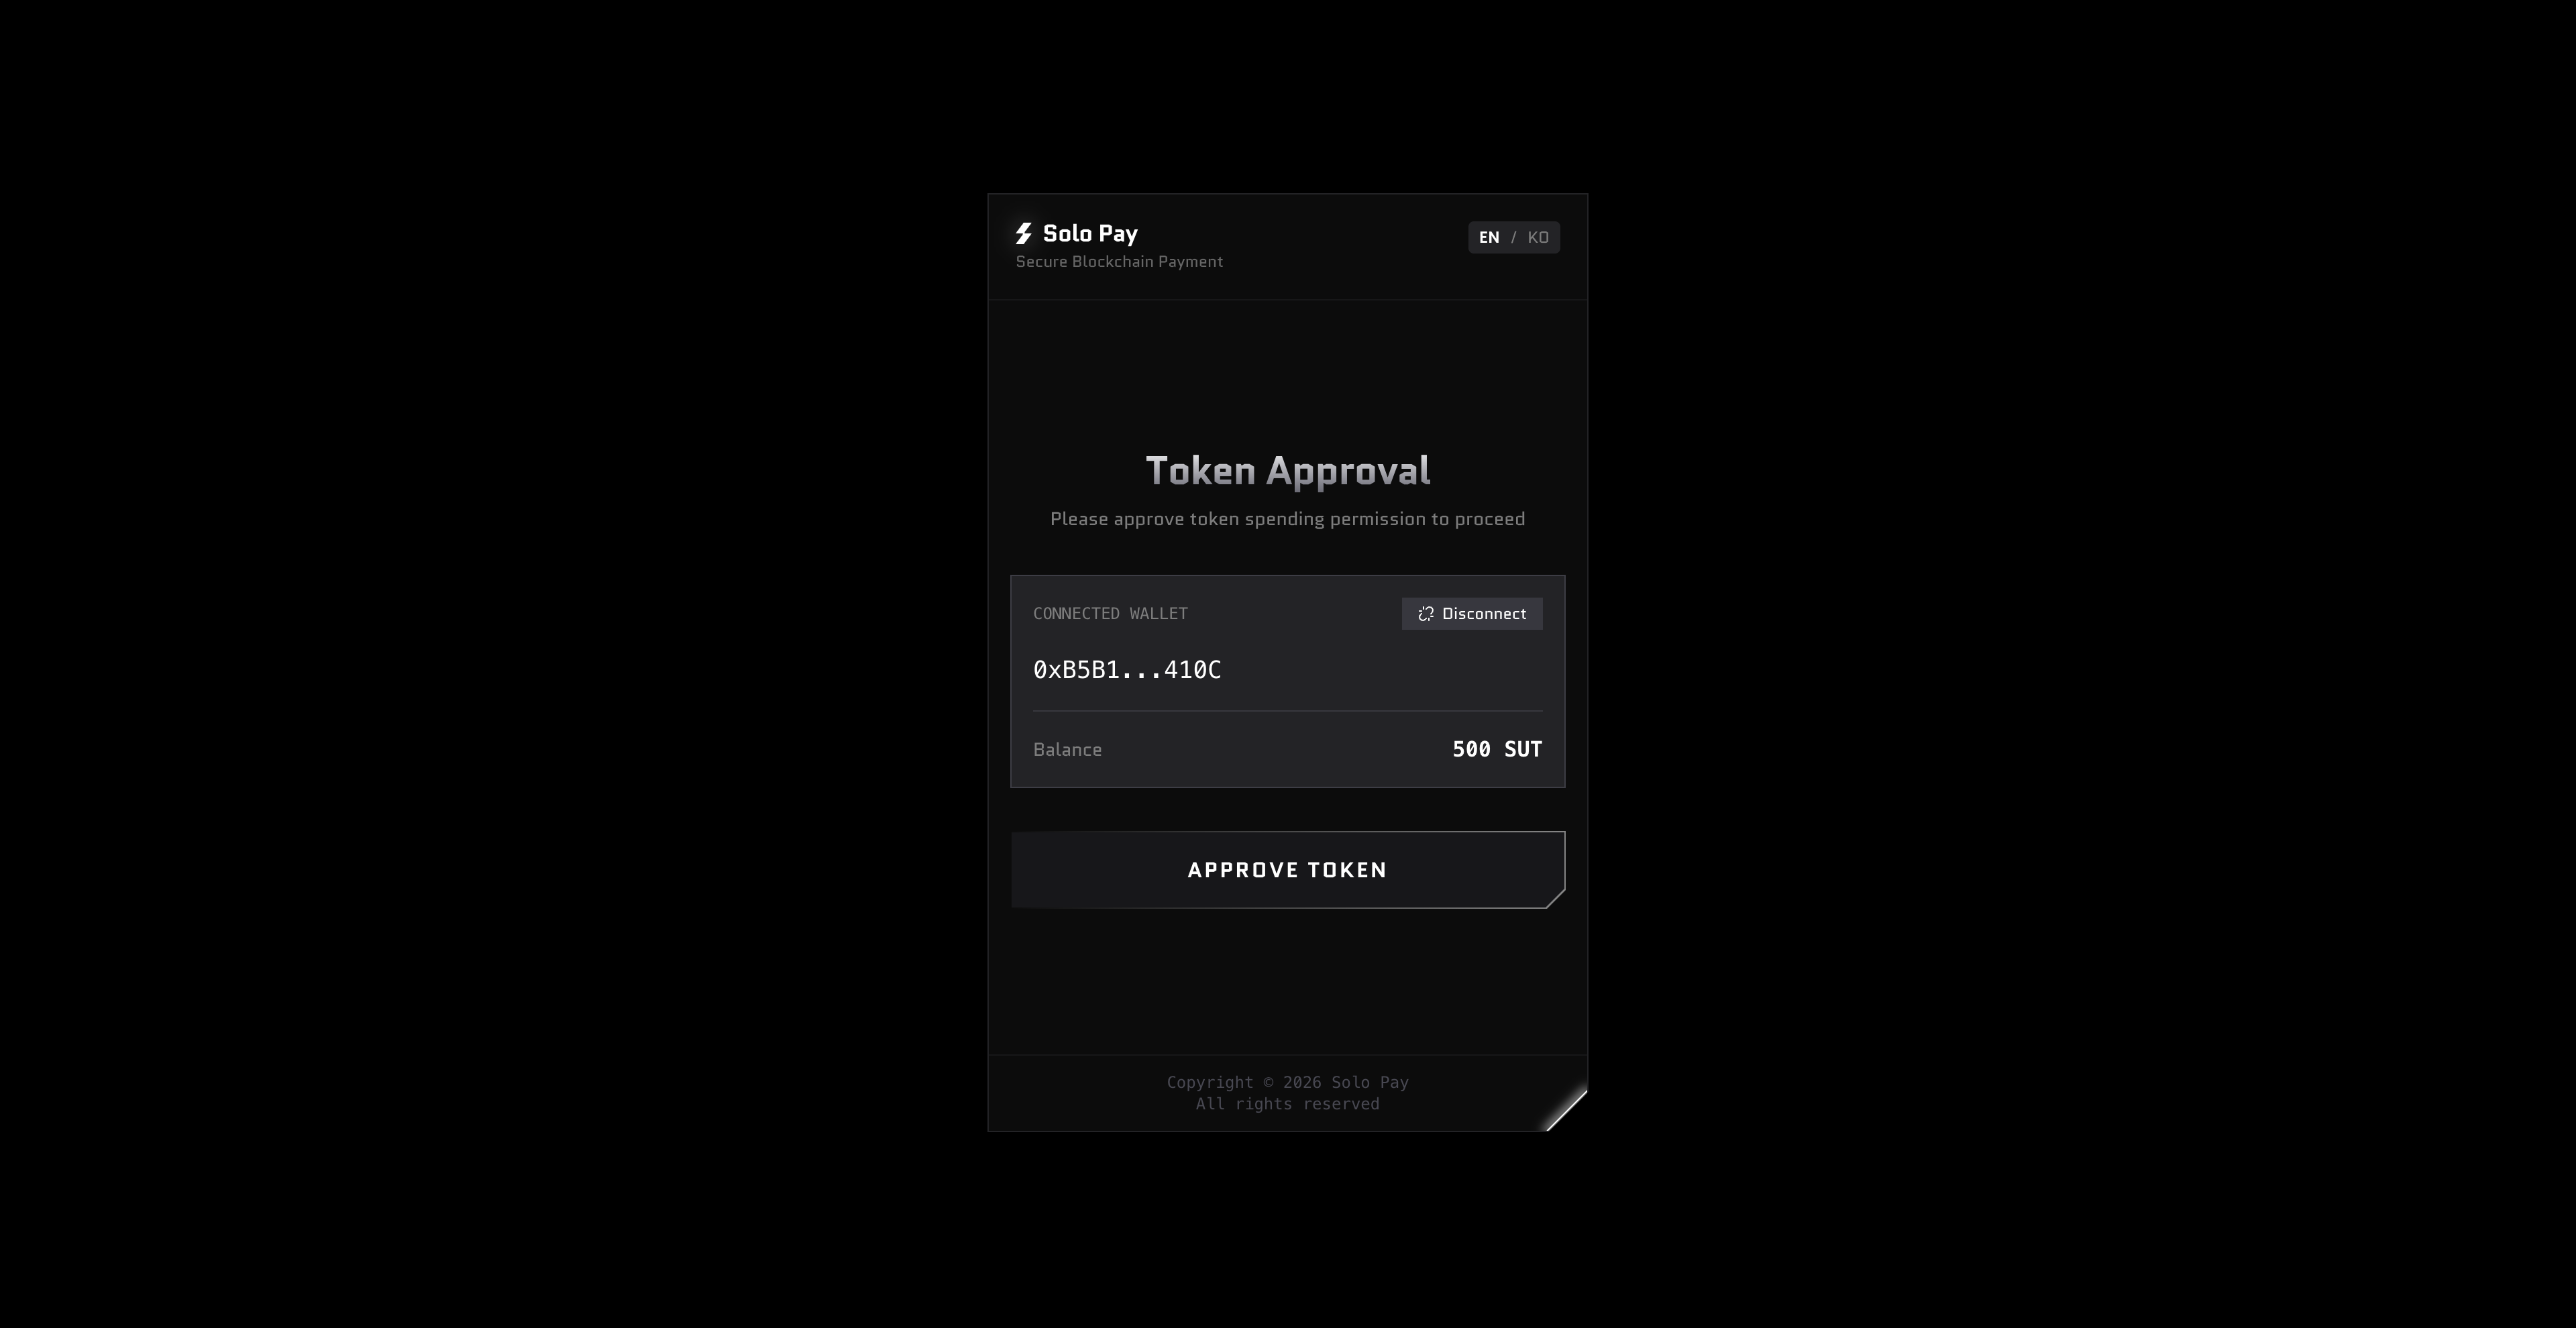
Step 4: Approve Token Usage
Click APPROVE TOKEN in the widget.
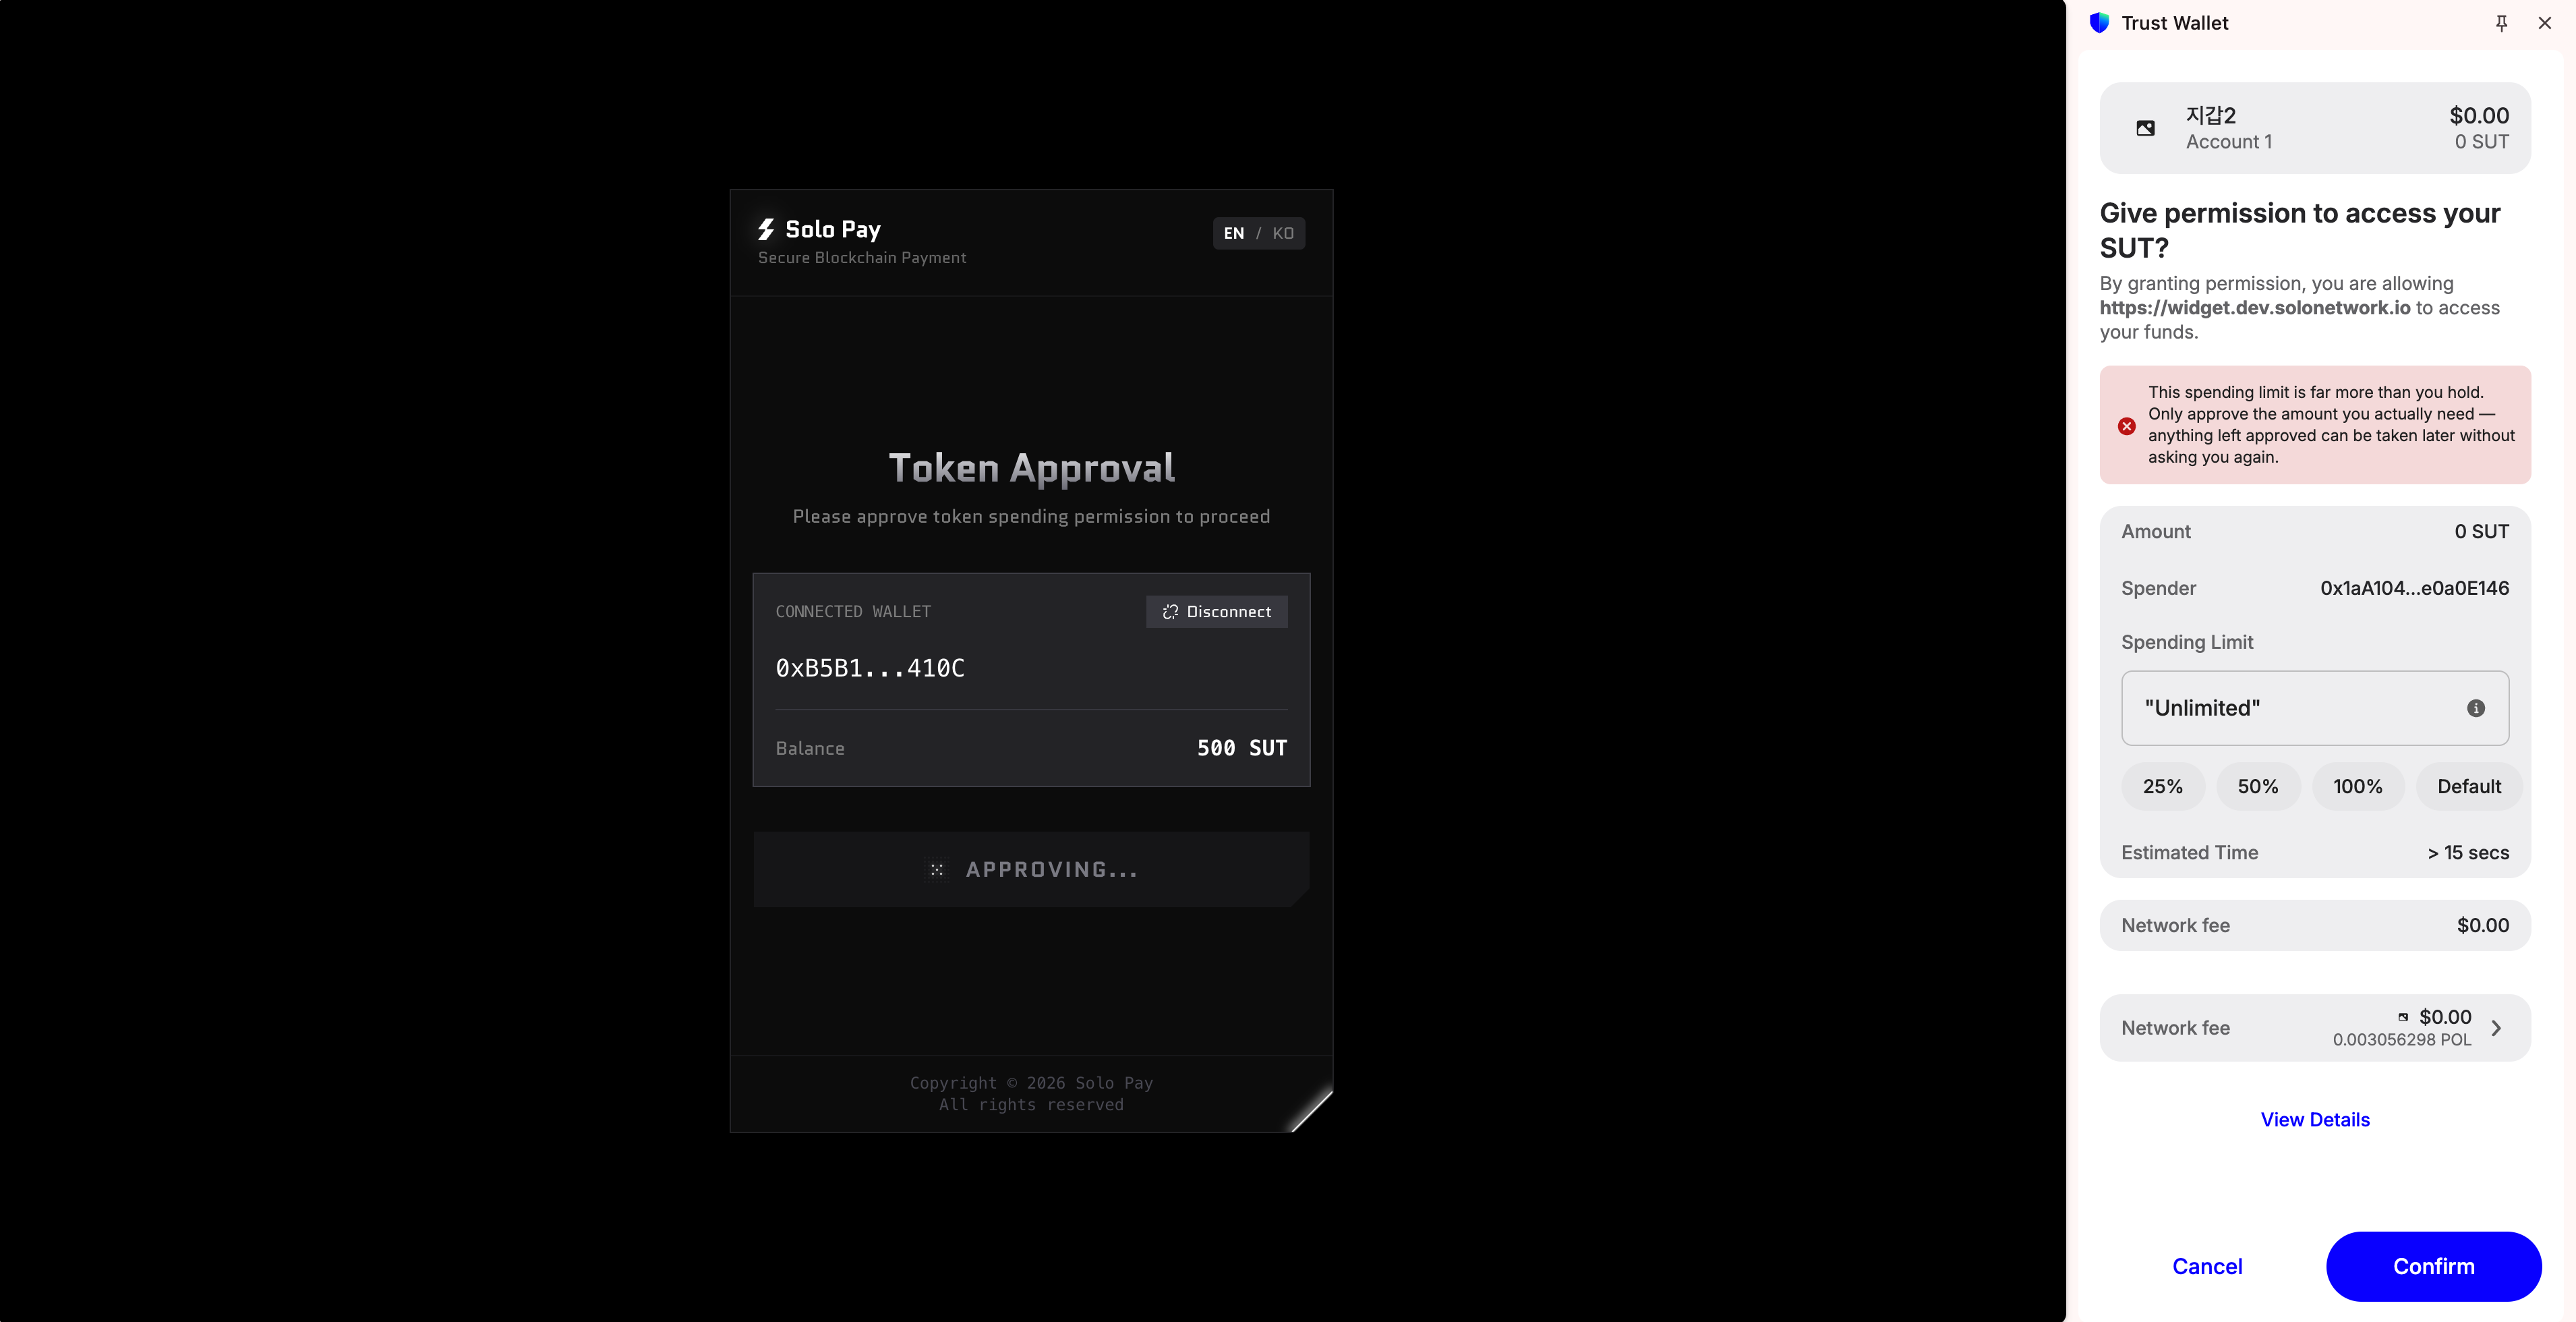
When the Trust Wallet token approval request appears, review the details and click Confirm.
(If a security risk warning message appears, review the content and click Continue to proceed.) 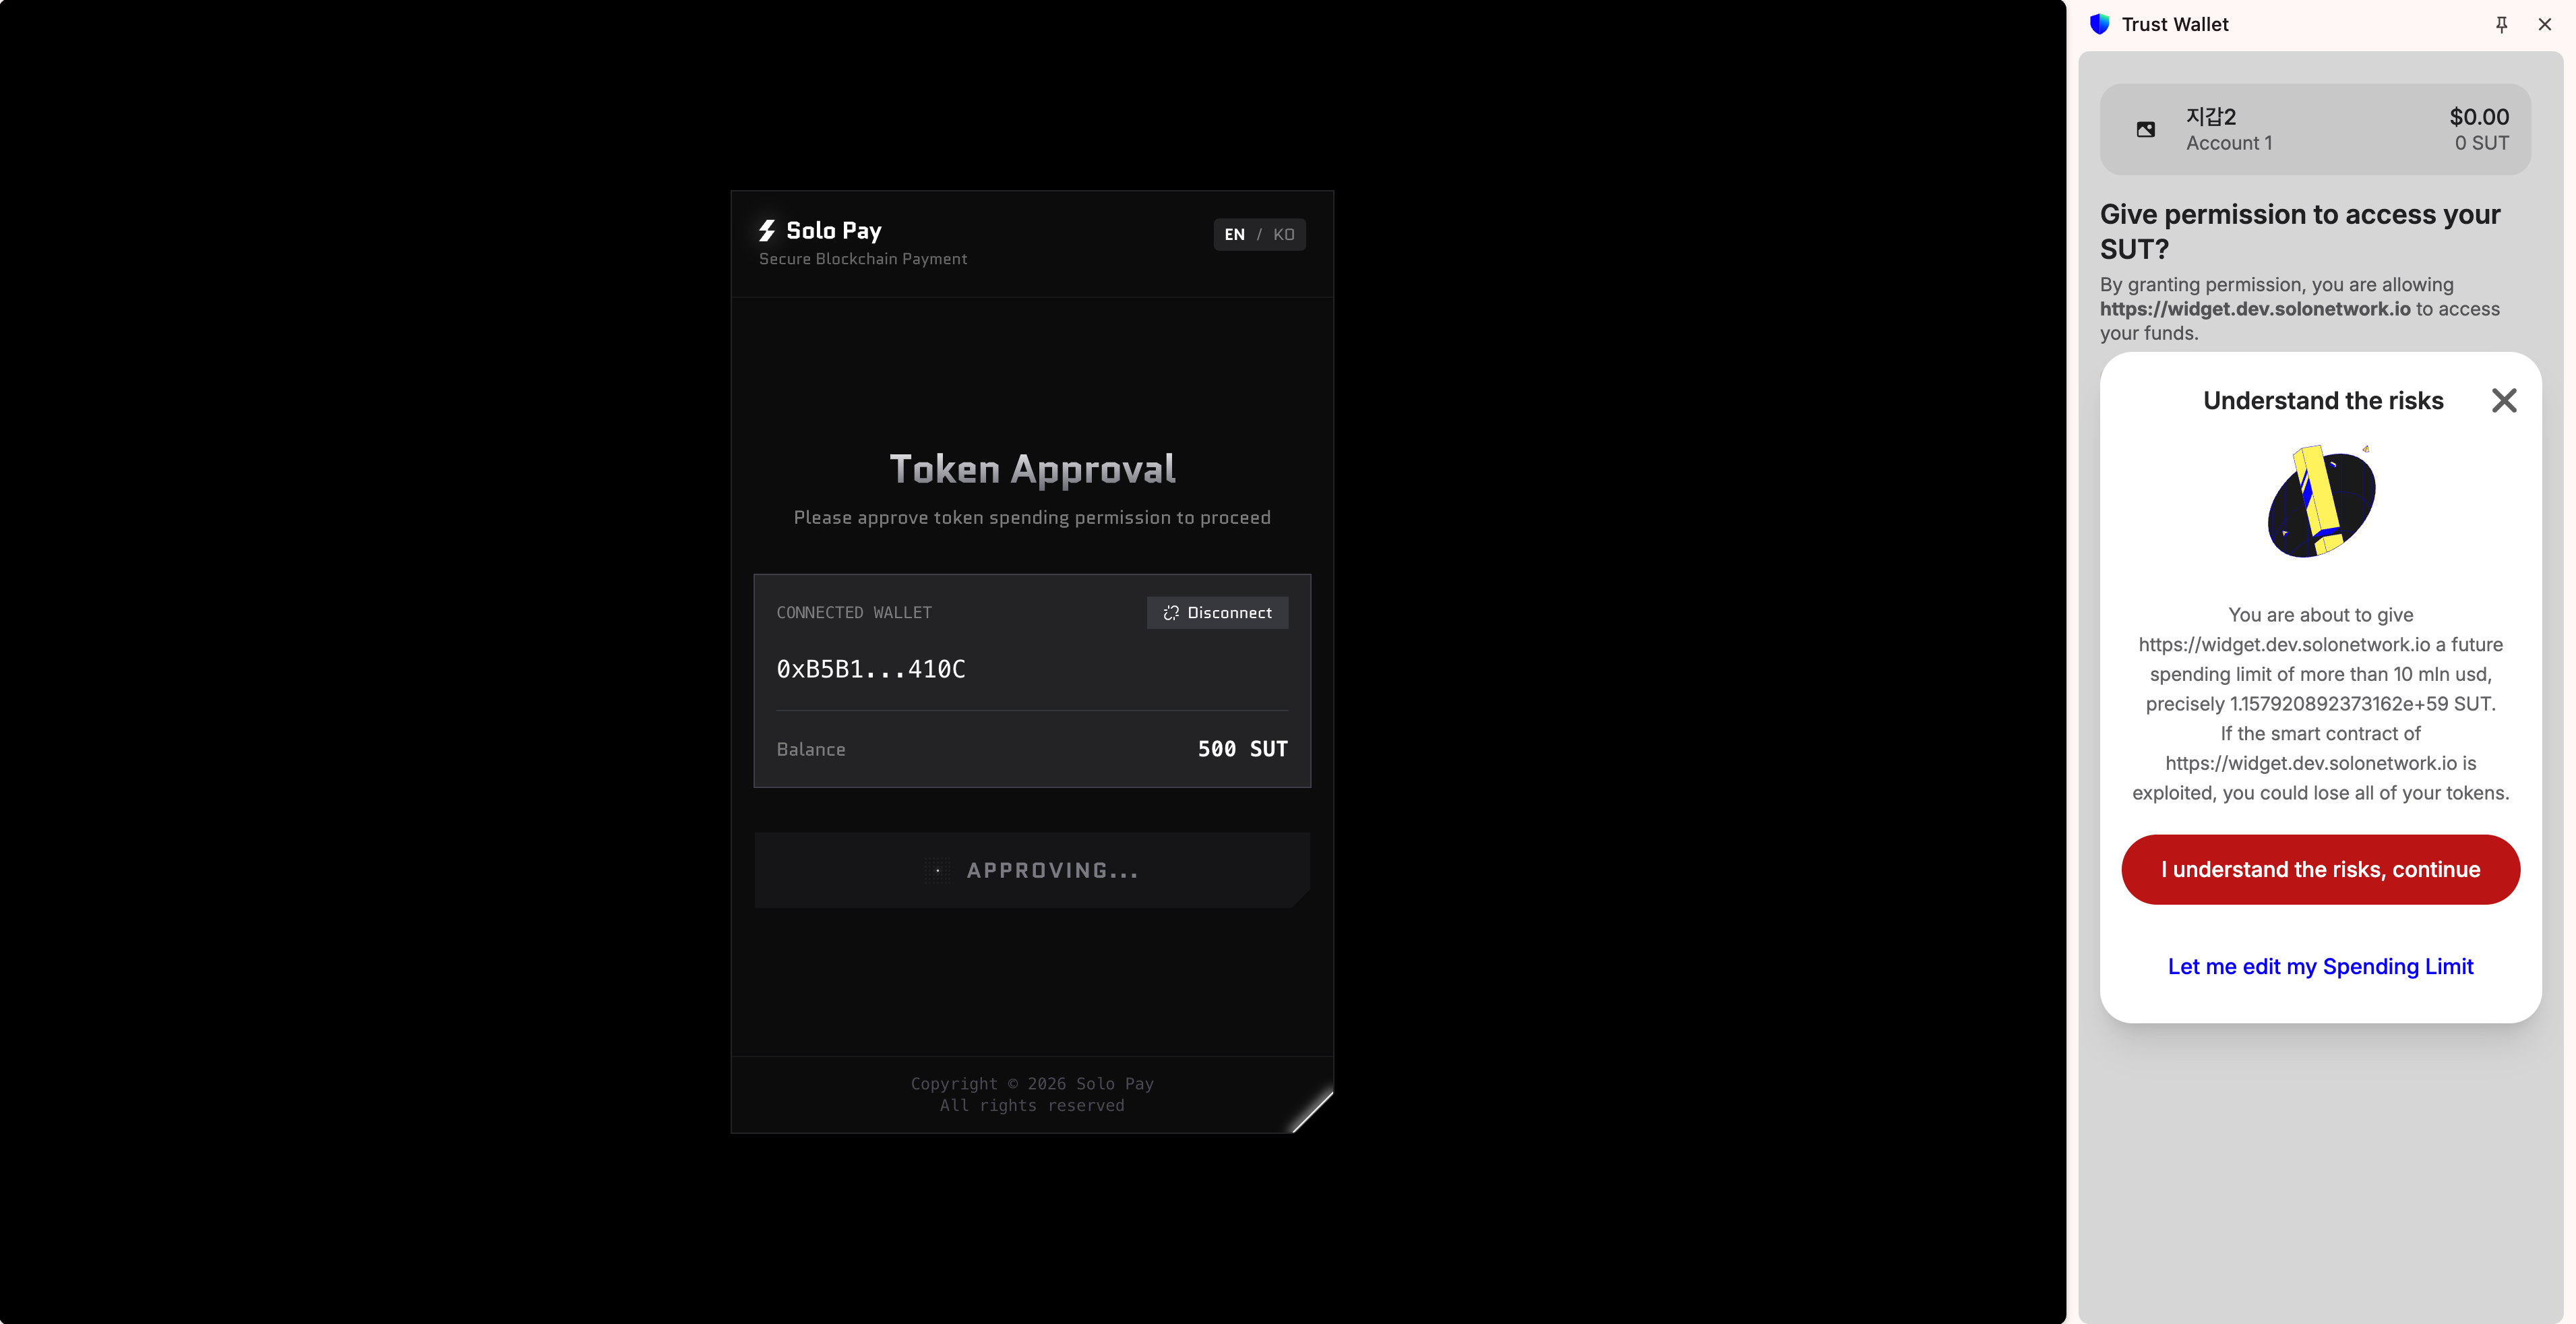
Step 5: Review Payment Details & Proceed
Once token approval is complete, you will proceed to the payment screen. Review the amount, network, and gas fee. The gas fee shows Free (Covered by Solo Pay). Click PAY NOW.
Step 6: Sign the Payment Request
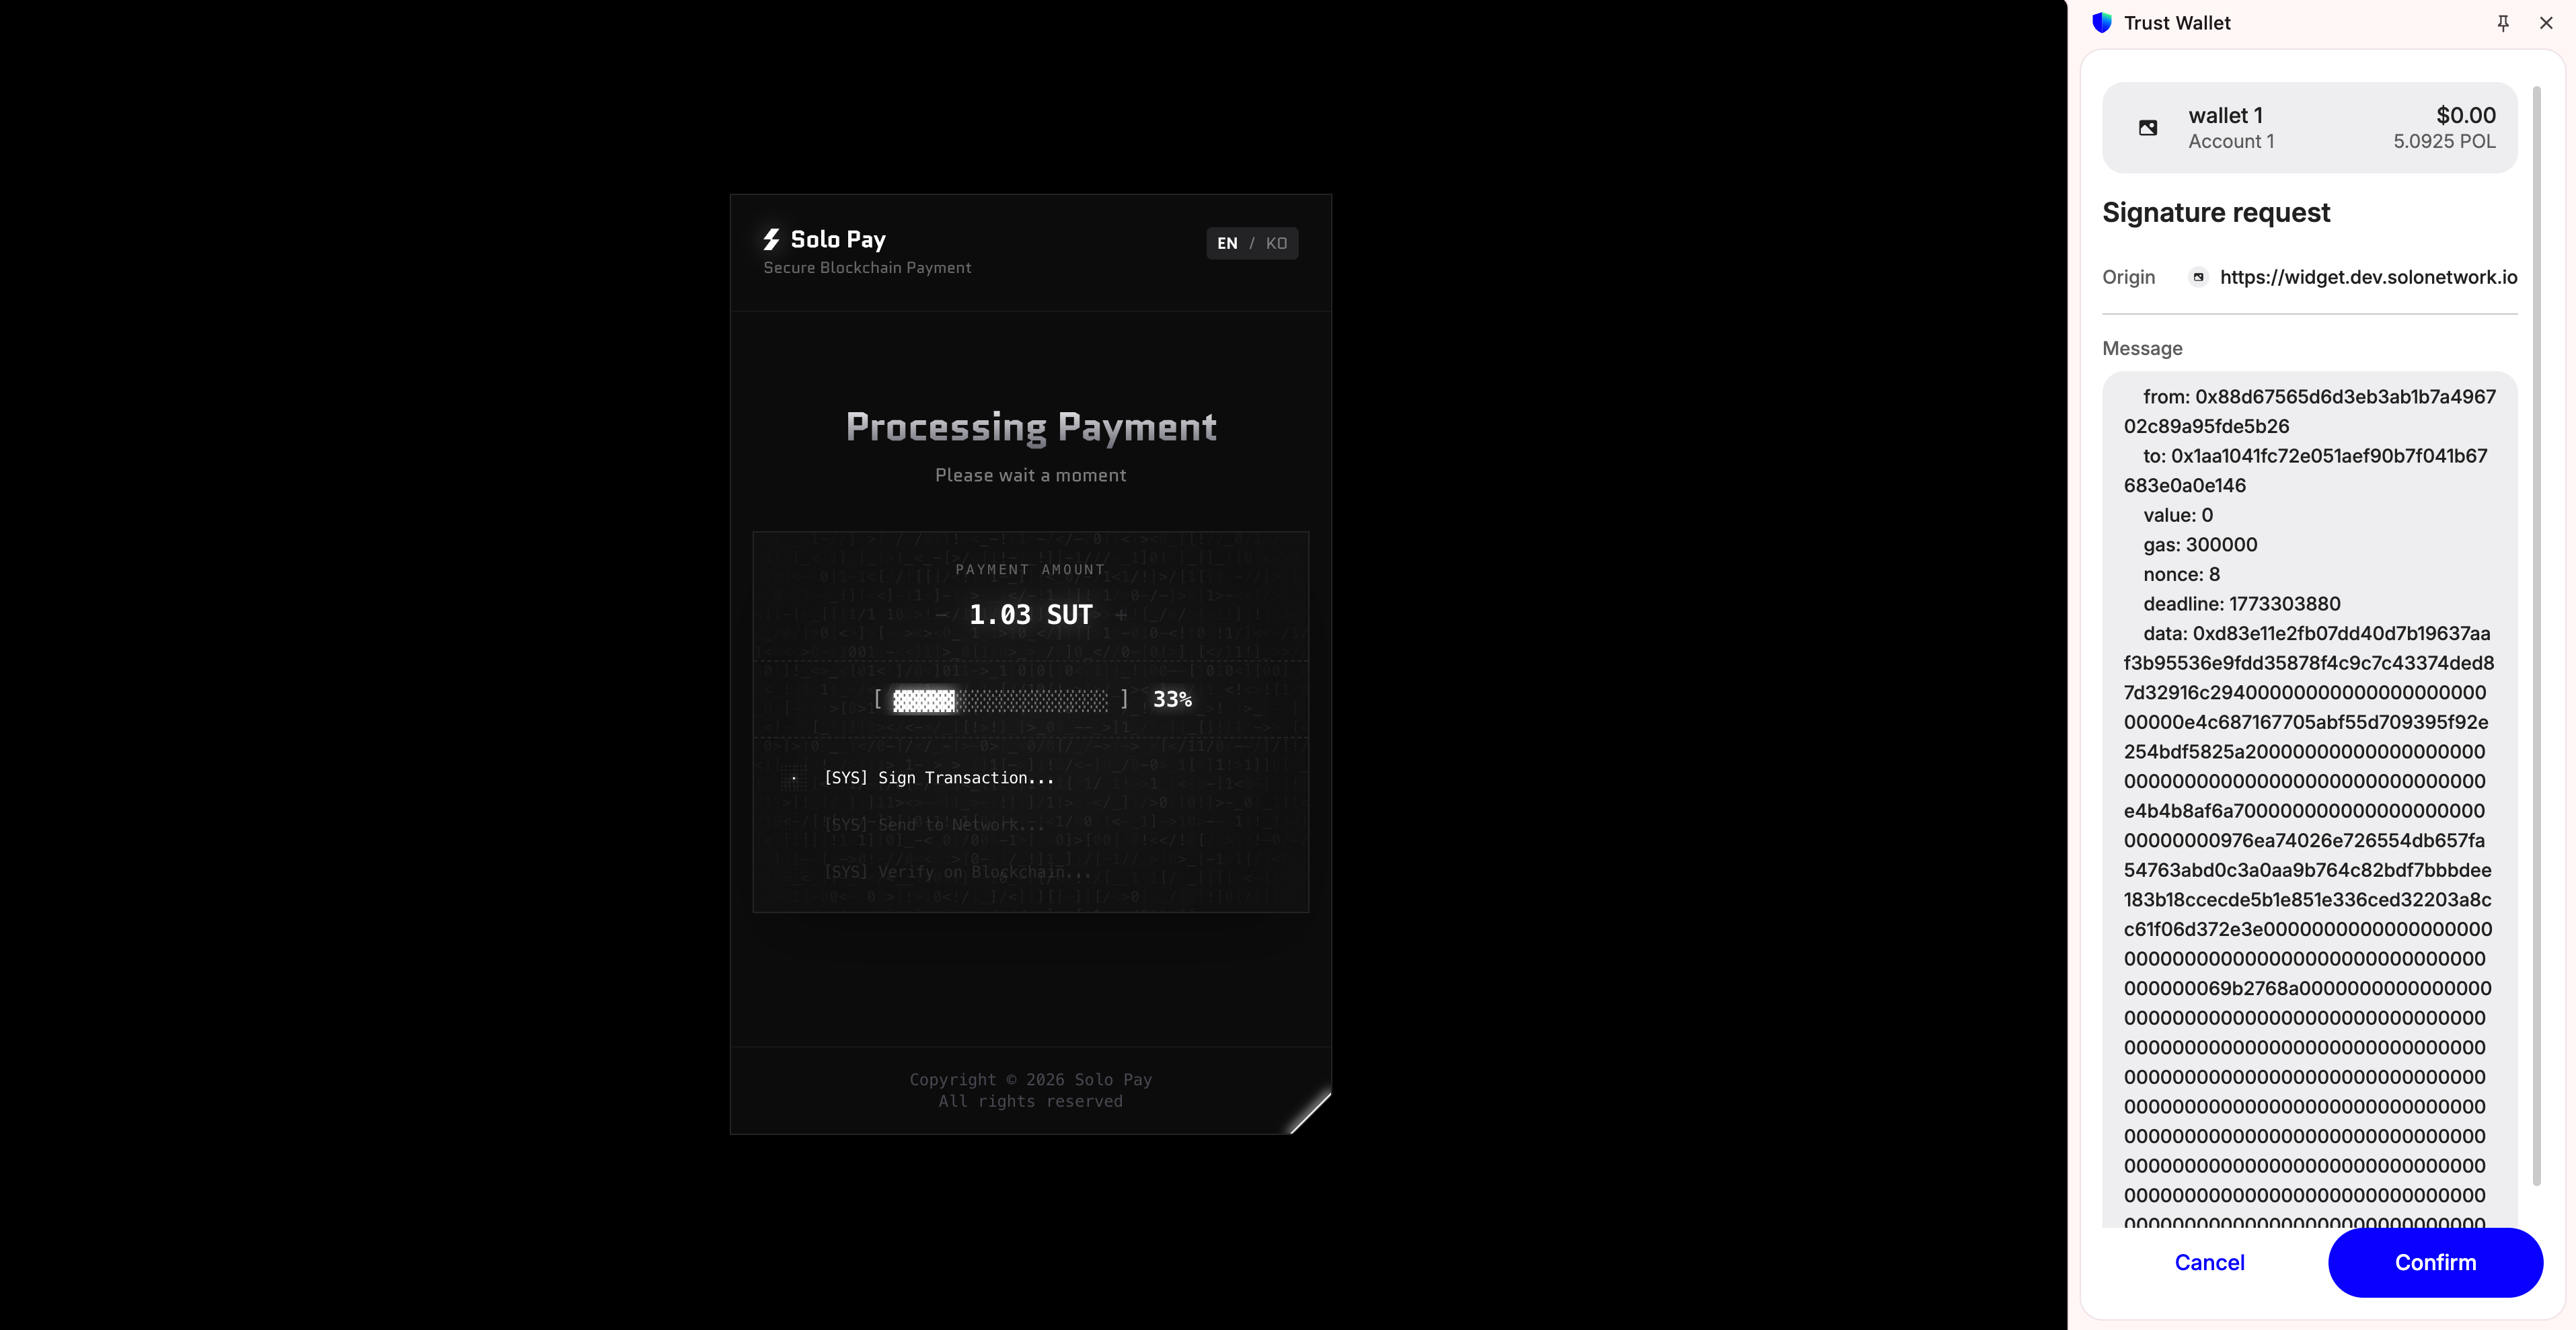
A Signature request popup will appear. This is the final payment authorization signature. No gas fee is charged. Click Confirm.
Step 7: Payment Complete
When the Payment Completed screen appears, your payment is processed, and the funds are held securely. Click RETURN TO MERCHANT to return to the merchant page.